You should already be using the Microsoft Deployment Toolkit (MDT) for deploying servers in production, in test environments, in lab environments – you get the idea. It’s a simple way to guarantee a reproducible, consistent image every time; and it also provides a decent amount of flexibility for driver installation, application installation and deployment automation (and I love automation). What is even nicer is that you can patch the OS images such that every deployment will not have to go through installing tons of Windows updates.
It took some time for me to figure out the best way to accomplish this:
- Use a capture image – not really automated and I don’t like the idea of starting with an image that’s already been deployed
- Manually – Painful, especially when you’re starting around 140+ patches depending on which OS you’re using (and it’s not automated)
- 3rd party update downloads – there are a few tools out there, and for the most part, they work OK. But the problem is that some of them require “update definition files” which may or may not get updated frequently; some of them don’t download in a format that is easy to use or automate
I fought with the 3rd party downloaders for a while…then I stumbled upon a great post by Microsoft MVP Greg Shields which describes using a WSUS server as a source for the update files. This is the method I had been looking for! Let me warn you: it is not 100% automated and by no means is it very graceful, but it works well. So, if you read Greg’s article, you’ll see that we are going to use a WSUS server to pull down Windows update files somewhat dynamically, then mount the offline images, recurse through the updates and install them, then save the image.
What we Need
- PowerShell will be the automation script of choice
- a standalone WSUS installation – we’ll be deleting update files and computer accounts, so don’t use your production WSUS server – also, don’t point other workstations\servers to this WSUS install; a separate install on the MDT server works well
- Working knowledge of DISM and WIM files
I’m not going to cover the basic configuration of MDT or the WSUS server – just configure WSUS to download the updates for the OS that you deploy with MDT and to check for updates (synchronize) nightly, which I believe is the default. Also note the update file download location – we’ll need that for the scripts.
The Initial Procedure
- Use MDT to deploy an empty OS – don’t patch it yet
- Apply a local or group policy such that the server will check in with the new WSUS server
- Computer > Admin Templates > Windows Components > Windows Update
- Configure automatic updates
- Specify intranet Microsoft update service location
- Automatic updates detection frequency
- Enable client side targeting (optional – if you want this computer to go into a folder in WSUS)
- Computer > Admin Templates > Windows Components > Windows Update
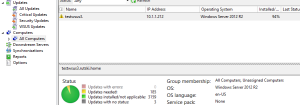
- Let this system check in a report to the WSUS server – this may take some time
- Once the system checks in, you should see the number of updates needed – in this case it needs 185
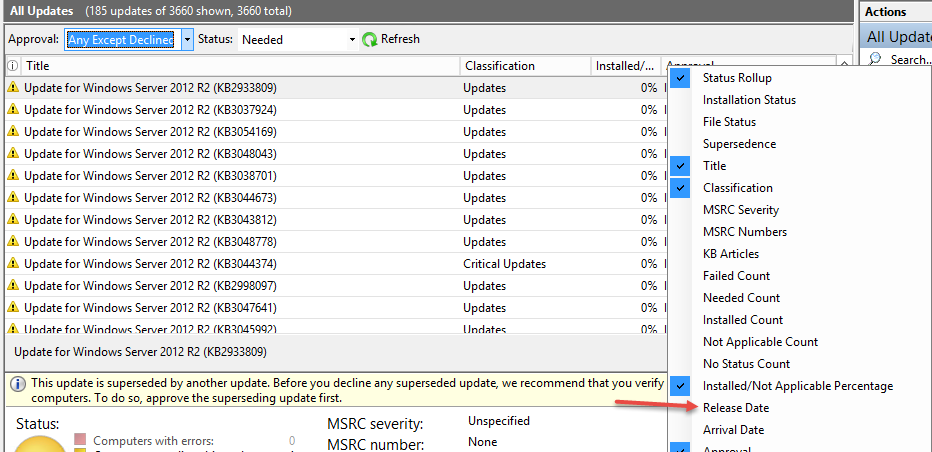
- Go to the ‘All Updates’ section and filter by ‘Approval: any except declined’ and ‘Status: needed’ – this will show the 185 updates needed
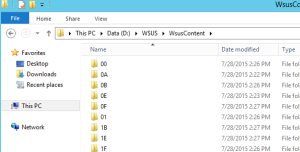
- Select all of the needed updates, and approve them – they will now begin to download in the WSUSContent directory with very odd names
- Once all of the updates have been downloaded, we can now run our initial script to install them to the offline image(s)


The Script
[code language=”powershell”]
#——————-
# WIM offline updater
# Inspired by: https://technet.microsoft.com/en-us/magazine/hh825626.aspx
# Author: Jake Rutski
# @JRutski blogs.serioustek.net
# Use at your own risk; I am not responsible for any issues caused by this script
#——————-
# Variables
$imagePath = "\\storage\Software\MDT\Operating Systems\Windows Server 2012 R2\sources\install.wim"
$wsusPath = "D:\WSUS\WsusContent"
$mountPath = "C:\Mount"
$imageIndex = 4
# Check for root
# http://blogs.technet.com/b/heyscriptingguy/archive/2011/05/11/check-for-admin-credentials-in-a-powershell-script.aspx
If(!([Security.Principal.WindowsPrincipal][Security.Principal.WindowsIdentity]::GetCurrent()).IsInRole([Security.Principal.WindowsBuiltInRole] "Administrator"))
{
Write-Host "`nThis script is not running as administrator – this is required to use DISM`n"
Exit
}
# Mount the image
Mount-WindowsImage -ImagePath $imagePath -Path $mountPath -Index $imageIndex
# Get the update files and install them offline
foreach($cabFile in (gci $wsusPath -Filter *.cab -Recurse))
{
Add-WindowsPackage -PackagePath $cabFile.FullName -Path C:\Mount
}
# Dismount and save the image
Dismount-WindowsImage -Path C:\Mount -Save
[/code]
*Note: The script must be run as administrator to use DISM. There are 4 variables in the above script:
- $imagePath = the path to the offline image, in this case, Server 2012 R2 in my MDT share
- $wsusPath = the path to the WSUS update files
- $mountPath = the path where the image will be mounted
- $imageIndex = the index value for the SKU to be modified, since WIM files can contain more than one image
Running this script will take some time to apply the initial batch of updates. Once it is done, the MDT share will now have an updated OS image – if you are using ISO files, you will need to update the media to apply the new WIM file; otherwise, you’re all set for this image. You will now need to delete the entire contents of the WSUSContent directory (I’ll explain shortly) and you will also want to remove the computer from WSUS just to keep it clean.
At this point, you can either deploy another blank image to manually verify that all of the needed updates are installed, or you can repeat the above procedure to download and apply any missing updates. If you go the manual route, you can download the needed files from the Microsoft Update Catalog and apply them manually using DISM commands – the above script will only work with .CAB files downloaded from WSUS; the update catalog provides .MSU files. *Note: some update packages are not compatible with being applied offline – see this post for details.
Going Forward
Once all of the initial updates (which may take more than one round of patching) are installed, your image can now be considered “up to date”. But in a few days or weeks, it won’t be up to date once patch Tuesday rolls around. There are two options to keep the image updated:
- Use the entire 7 step initial procedure above
- Since machines should not be checking in with this WSUS server, you can use ‘all updates’ to view and approve new updates as they become available
- Right click and add the ‘Release date’ column to the WSUS console and sort by release date
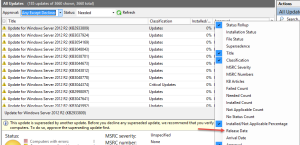
- As patch Tuesday rolls around (or out of band patches are released) you can simply approve all of the new updates that are not marked as approved
- Once the updates are downloaded, run the script again, and your image will now be up to date – it should also be much faster this time as this would be a ‘delta’ with far fewer updates
- After running the script, delete the contents of ‘WSUSContent’
- Right click and add the ‘Release date’ column to the WSUS console and sort by release date
A few Notes
- Option 2 for keeping the images updated going forward will work with multiple images – for example, if you start downloading updates for Windows 7, Windows 8.1 and Server 2012R2, the script will recurse through all of those files and try to apply them. Fortunately, DISM is smart enough that it will check if the update is applicable to the offline image.
- The script can be modified to reflect multiple OS images, etc