The AppDisk TechPreview bits were released to the public a few days ago – you can download them for yourself if you are a partner or a customer and have active SA or SWM as of September 21st, 2015 – the download is available here. This release is branded as XenApp and XenDesktop 7.7 and includes the following experimental features (as well as some features from a previous tech preview release):
- AppDisks
- AppDisks on vSphere
- AppDisks on XenServer
- Server and Desktop Management (multiple reboot warnings, proactive PNA alerts)
- Storefront configuration on a per store basis
- MCS
- Fast image rollout & Provision from Hypervisor templates (API)
- License server call home
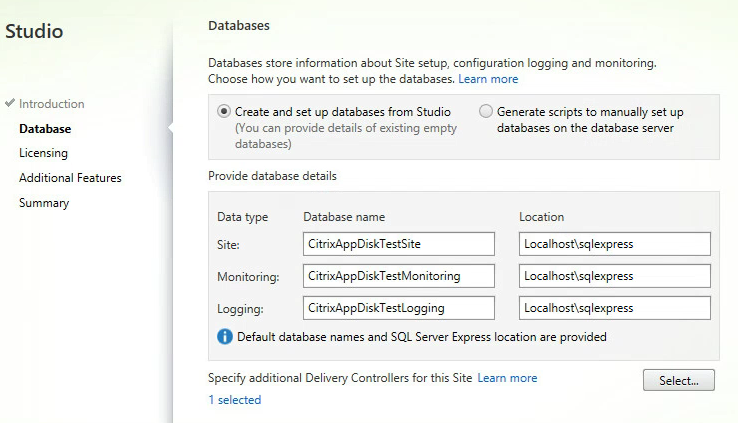
- Improved Database setup
- Specify different databases for site, monitoring, and configuration logging & Improved error handling
- Application Management
- PVD performance improvements during the prepare state
- Director – desktop & VM usage; zoom in & drill down; export trends
Before we get started installing Citrix AppDisk, you need to read the admin guide here – this is a new feature as well as an experimental feature, so there are some very specific instructions on how to set all of this up. Also of note is that this is a technical preview – features in this release may or may not make it into final code release and if they do, they may not look and feel like they do in the TP.
*Note: This post will not cover installing AppDNA or the integration
Step 1: Install your infrastructure using the XD7.7TP media
The install is much the same with a few notable differences. First, you have the option to configure App-V and AppDNA integration during setup. The second is the ability to select different database locations for the different XenDesktop databases:
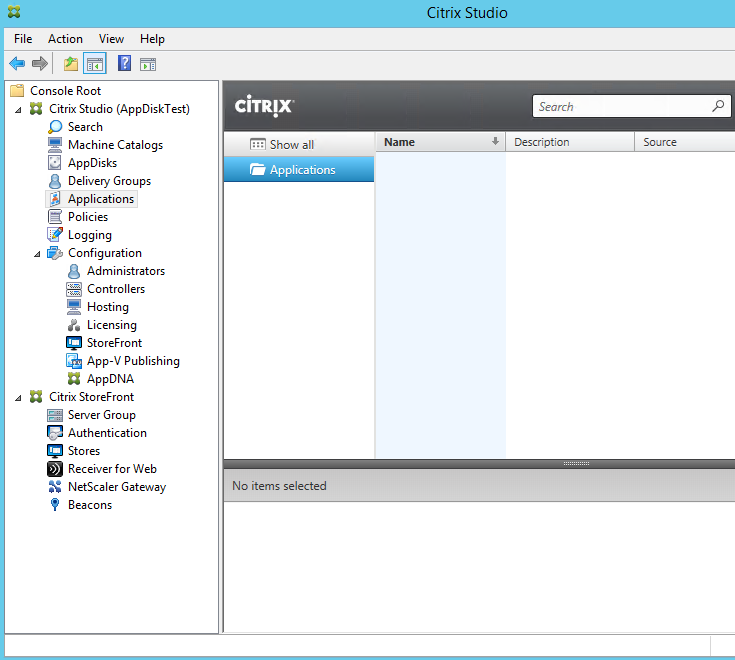
Studio looks about the same, with some new application management functionality which should make it easier to add a single application to multiple delivery groups without having to use PowerShell:
Prerequisites
But we’re here to talk about installing Citrix AppDisk. You will need essentially three machines to start with:
- The machine to use as the end XenApp\XenDesktop machine – this is the machine that you will attach the completed AppDisk to (part of a delivery group)
- The master image to create an MCS\PVS machine catalog (this machine is used to create #3)
- The machine to use to create and prepare the AppDisk – this must be provisioned by MCS or PVS and a part of a machine catalog but NOT allocated to a delivery group
*Note: the preparation machine cannot have an existing snapshot – AppDisk creation will fail
Step 2: Setup the AppDisk
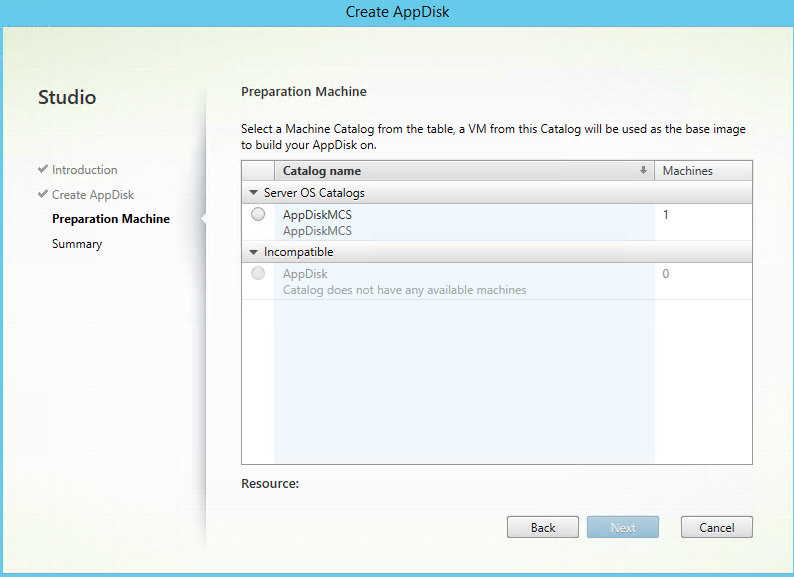
Once you have the machines setup, you can go about creating a new AppDisk – there are two ways to do this: manually or via Studio. I’ll cover the Studio method.
From the ‘AppDisks’ menu in Studio, click ‘Create AppDisk’. You will need to choose a size for the AppDisk based on the amount of data it will contain – the options are 3GB, 20GB, 100GB or custom. For this demo, I am going with 3GB.

Next you need to choose an installation\preparation machine – this is the machine you will use to install the applications.
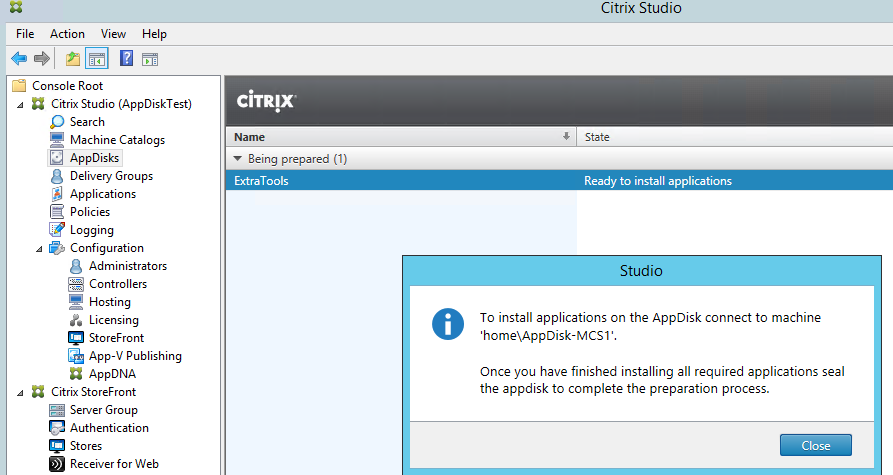
Last, give the AppDisk a name and description. Once that is done, Studio will then show a progress bar as it prepares the preparation machine.

During this time, the machine will power on, and reboot at least once. DO NOT begin to install the applications until Studio shows that the machine is ready.
Step 3: Install your apps and seal the AppDisk
Once the machine is ready, install your application(s). Once installed, do not shutdown the machine – head back to Studio, select the AppDisk and choose ‘Seal AppDisk’
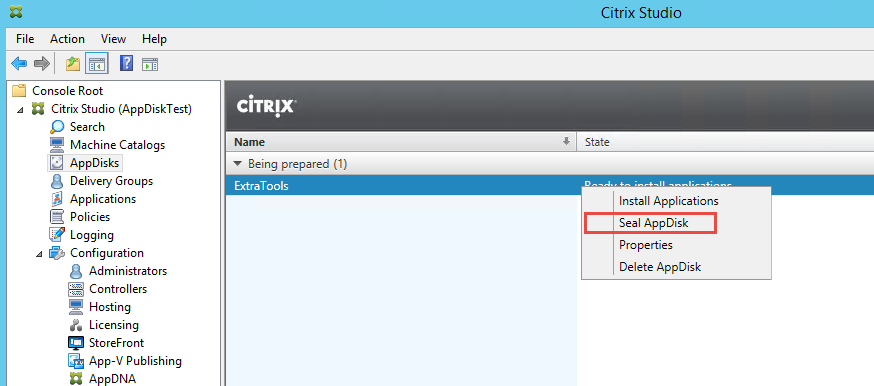
The seal process will shutdown the machine and run several reconfiguration operations.

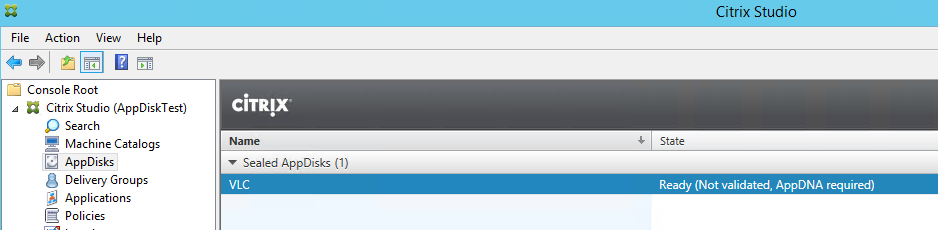
Once completed, the AppDisk is ready to be deployed. *Note: AppDNA is required in order to list the applications installed in the AppDisk.
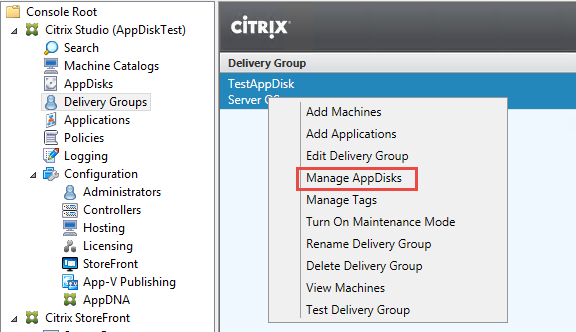
Step 4: Attach your AppDisk
Select the Delivery Group – then ‘Manage App Disks’
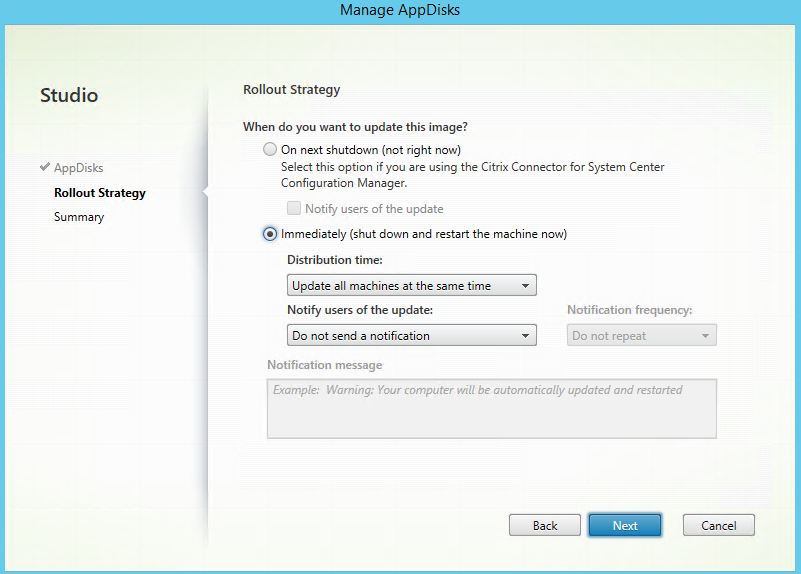
Select your App Disk then choose your deployment strategy – this is the same way you deploy MCS updates – either deploy immediately and reboot now, or schedule the update.
Once rebooted, the target machine will have the applications ready for use. You will also notice a few volumes attached without drive letters.
Considerations
While it is nice to have the configuration of AppDisks directly within the Studio console, managing the individual machines in catalogs and all of the potential snapshots can be confusing. The implementation of AppDisks is otherwise fairly simple and straightforward – more notes from the admin guide, as this is a Technical Preview:
- Updating AppDisks is not currently possible in Studio – the manual process must be used
- AppDisk apps cannot be XenApp published apps
- The preparation machine cannot be used by a user
- AppDisks can be used interchangeably between MCS and PVS delivery groups
- Assuming the same bitness, AppDisks should work between Windows 7\Server 2008 R2; Windows 8.1\Server 2012 R2
Looks like installing Office 2016 is not a good idea. I’m getting errors when starting Office applications. That’s why probably AppDNA is advised to use with it. Tech preview.. so it can only get better I suppose.
Dieter –
I did not try to AppDisk Office 2016 specifically – though there is a specific note about rearming any applications that use KMS – like Office. I will try to give it a shot to see if I can get it working.