There was a comment recently on the Duo integration blog post about how to do a similar integration between Citrix ADC (NetScaler) and One Identity Starling MFA. Thanks to nFactor authentication, this is a relatively simple task. One Identity Starling is very similar to Duo in that there is a ‘RADIUS agent’ that runs as a service on-prem that communicates with a cloud service. This is the first piece to be configured.
Getting Started
First, download and install the Starling Two-Factor RADIUS Agent on a Windows server in your datacenter – documentation can be found here. Once installed, there are essentially three settings that need to be configured:
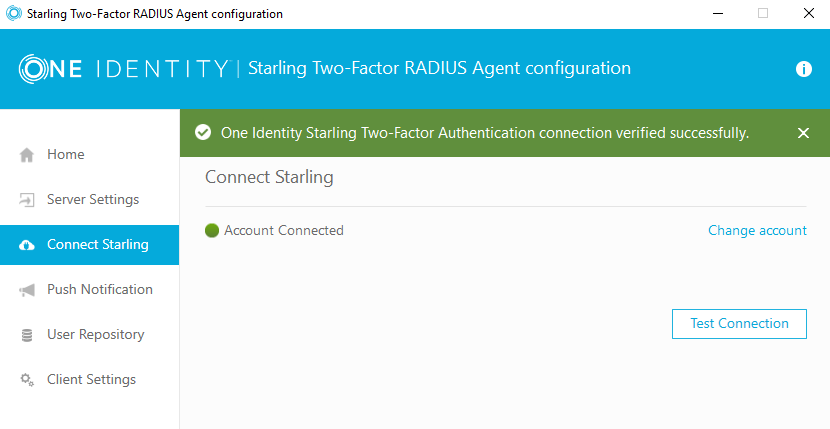
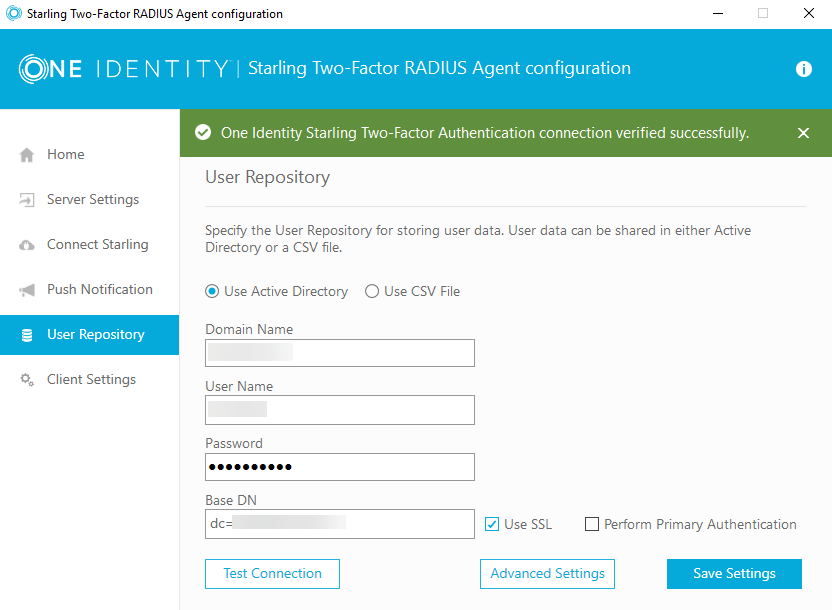
First, you will need to connect the agent to the Starling service by logging in via the Connect Starling UI. Next, configure the user repository – in this example, I have configured Active Directory:
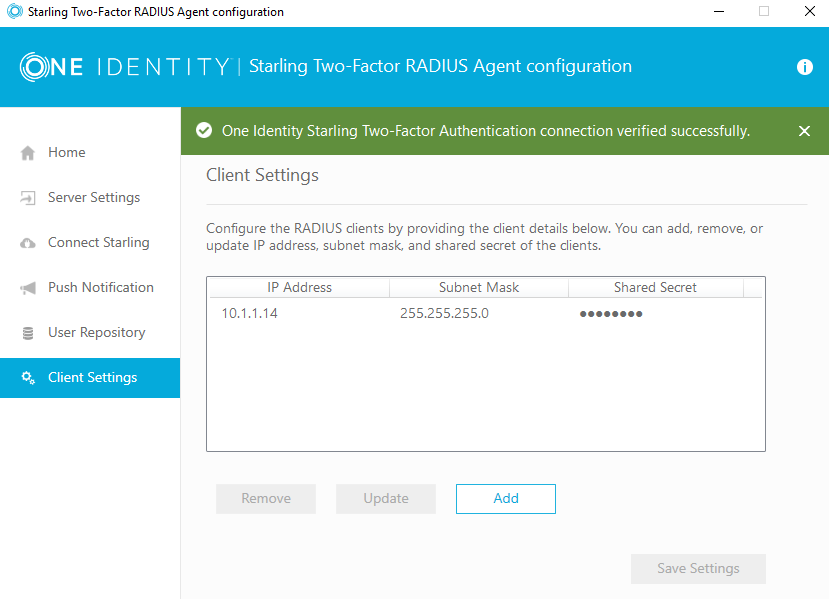
You then need to configure the client settings – remember, by default, RADIUS traffic originates from the NSIP. You will also configure the shared secret here – you will also need later for the RADIUS configuration on the ADC.
There are a few other settings, but the default settings should work just fine.
nFactor Configuration
The first thing to configure on the ADC is the RADIUS server – you will only need the IP address and shared secret. No additional setting should be changed if you are using the default settings on the agent.

From here, there are several options to present this to the users – it can be a 2nd step or it can be presented along with the first username\password credentials. I recommend following the ‘dropdown’ configuration from my duo configuration here. There are a few additional configurations we need to make due to the way that the RADIUS agent expects input.
The RADIUS agent expects the user to enter strings into the text field based on how they would like to authenticate. For example, enter ‘SMS’ to receive an OTP code via text, ‘Phone’ to receive a code via a phone call, or leave the field empty to receive a push notification via the app. While this does work, it is a painful scenario for users that may not have the app installed, having to enter an additional string of characters.
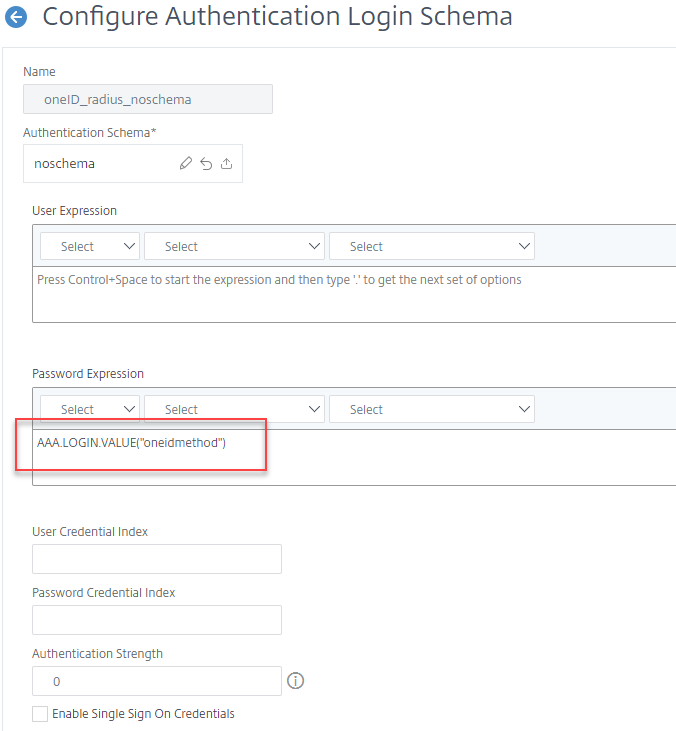
When creating the dropdown schema, attention must be paid to the ID of the of the dropdown and the InitialSelection values, to set them to the values that OneIdentity is expecting:
<Requirement><Credential><ID>oneidmethod</ID><Type>none</Type></Credential><Label><Type>none</Type></Label><Input><ComboBox><InitialSelection>SMS</InitialSelection><DisplayValues><DisplayValue><Display>OTP SMS</Display><Value>SMS</Value></DisplayValue><DisplayValue><Display>OTP Phone</Display><Value>Phone</Value></DisplayValue><DisplayValue><Display>OTP Push</Display><Value>Push</Value></DisplayValue></DisplayValues></ComboBox></Input></Requirement>The next configuration is a noschema (meaning that nothing is displayed to the user for this step) Login Schema that will pull the value from the dropdown and pass the string to the RADIUS agent, by specifying the Password Expression:
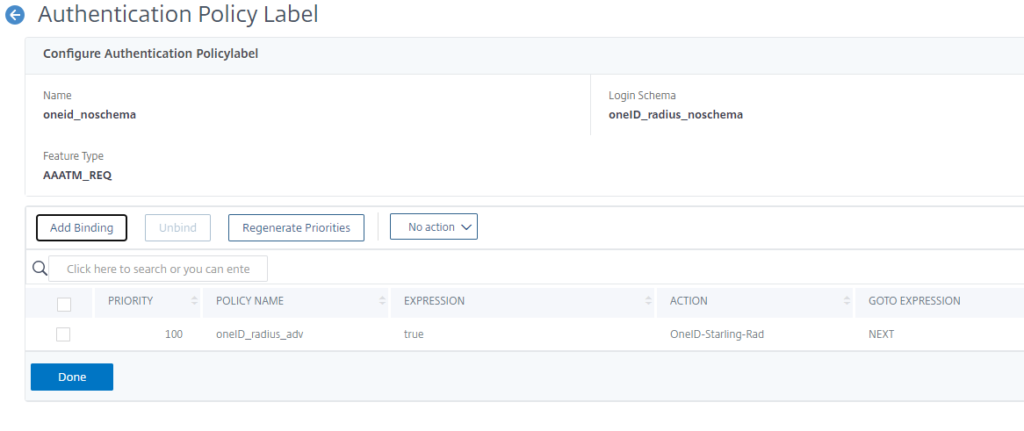
Next, create the Policy Label – it will have the previously created schema bound to it as well as the RADIUS policy:
Troubleshooting
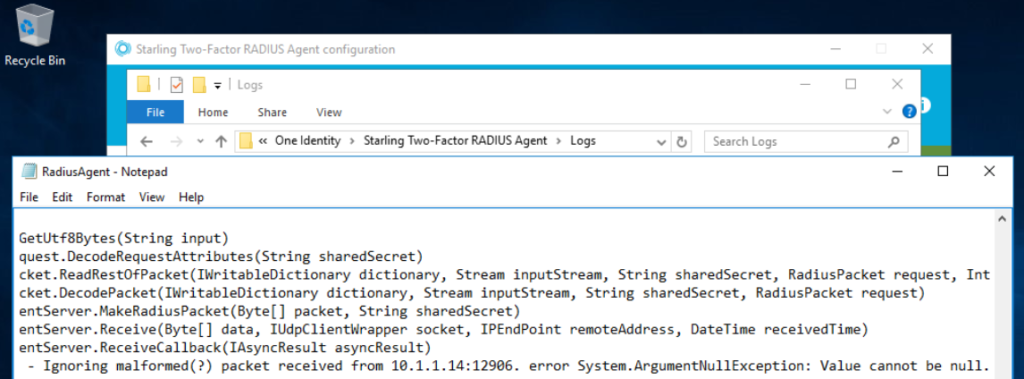
The RADIUS agent logs can help in troubleshooting, they are located at C:\Program Files\One Identity\Starling Two-Factor RADIUS Agent\Logs Initially, I had misspelled the <ID> between the schema and the password expression, so NULL was sent to the agent.