The Microsoft Deployment Toolkit is my preferred method for deploying Virtual Machines in the lab (everywhere, really) – There are no potential issues with cloning, software can be automatically installed, and a driver pool can be kept up to date. It also allows for offline servicing of the base image, so no waiting for 140+ Windows updates. One of my latest adventures has been using Nutanix Community Edition (NCE) to get a feel for how it all works and the new Acropolis hypervisor system.
NCE requires some beefy hardware to get started – this is meant to be a full cluster deployment, so no less than 32GB RAM, 1 SSD, 1 spindle, and lots of CPU; you can also nest inside of another already built hypervisor environment. I am not going to cover the initial setup, so this assumes that you have already completed a base configuration, created a storage container, and have a network configured. Let’s start spinning up some VMs.
I use Windows Deployment Services to provide PXE to the MDT WinPE image – so the first thing I did was try to see if an empty VM with a blank disk would boot into PXE. The answer here is NO, it won’t. I’ll cover how to go about fixing that in a bit, but the next thing I did was to create a bootable ISO with WinPE and the MDT image.
First things first, the storage and network drivers need to be injected into the images. Acropolis is based on KVM, so we need to use the VirtIO drivers – I obtained a copy from here: https://fedoraproject.org/wiki/Windows_Virtio_Drivers – under ‘Direct Download’ choose Stable virtio-win iso.
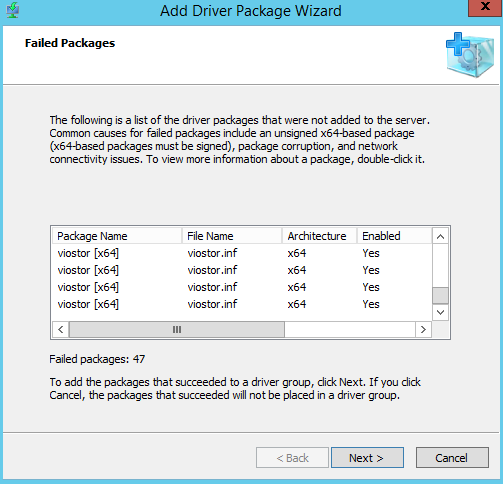
Once you’ve got the files, add them to the WinPE boot image using the WDS console…there will be a problem, though – none of the x64 drivers will be added because they are not digitally signed.
Not the end of the world, but now we will need to manually inject the drivers into the boot image. to do that, we need to manually mount the image, inject the drivers using an unsigned override switch and save the image. First mount the image – in my case, I’m using C:\Mount as the mount directory.
[code language=”powershell”]
dism /mount-wim /wimfile:D:\RemoteInstall\Boot\x64\Images\LiteTouchPE_x64.wim /MountDir:C:\Mount /index:1
[/code]
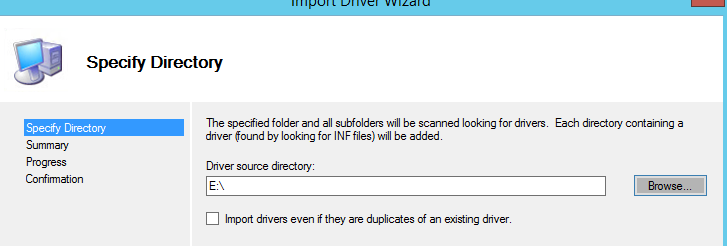
Next, inject the drivers from the downloaded ISO – I have the ISO mounted to E:\
[code language=”powershell”]
dism /image:C:\Mount /Add-Driver /Driver:E:\ /Recurse /ForceUnsigned
[/code]
There should be about 80 packages that will be loaded. Last, we’ll commit the changes and save the image.
[code language=”powershell”]
dism /unmount-wim /mountdir:C:\Mount /Commit
[/code]

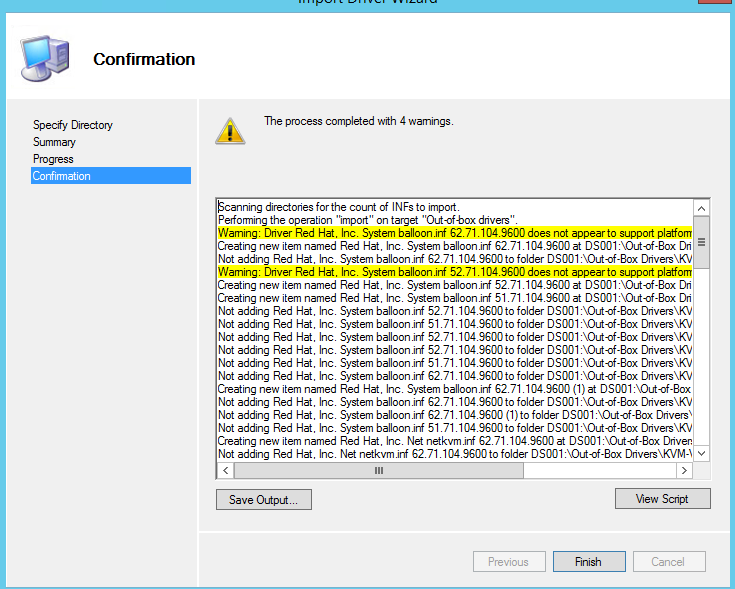
Don’t forget to copy this newly updated WIM file from the RemoteInstall directory of WDS to the MDT share. So that takes care of the drivers for WinPE, now to add the drivers to MDT; fortunately, this will not require manual steps as MDT does not check for signed x64 packages. I created a new driver folder named KVM-Virtio and launched the ‘Import driver wizard’, again using E:\ as the source.
You should again see about 80 packages get added (with a few warnings about duplicate packages and architecture mismatch).
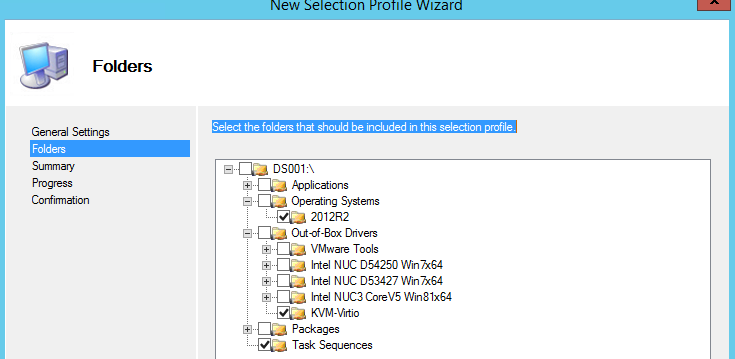
Next, I created a selection profile specifically for Windows Server 2012R2 and the VirtIO drivers.
And create an ISO using the newly created profile:
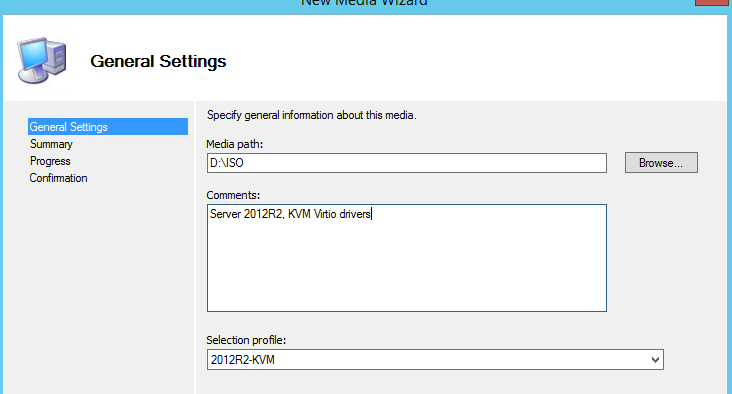
Don’t forget to update your ISO Media content to build the ISO! Next, upload the ISO to a storage container created in your NCE environment. SCP to the CVM on port 2222 and upload the ISO file. Once that is done, you will be able to choose it from in the VM menu (just start typing in the path field, it should auto-populate):

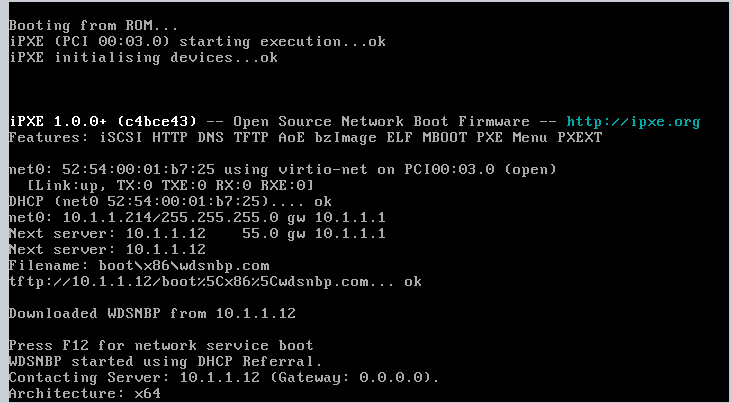
Boot to the CDRom and because the drivers are available in WinPE, you should see the OS build begin successfully.

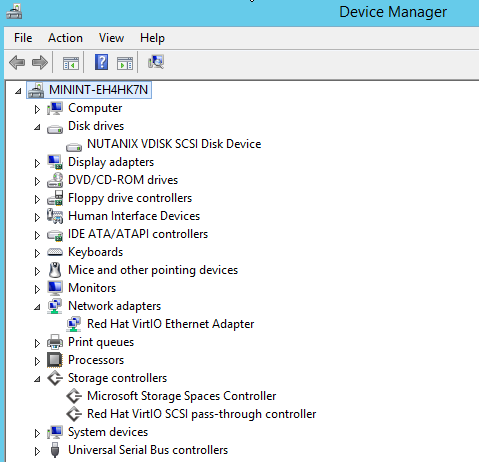
And show up in Device Manager once the VM is built indicating that the drivers are also available in the MDT image.
Great! So now we’ve got the drivers needed for KVM, but who wants to go through the process of updating and uploading an ISO all the time? Not me. So why didn’t PXE work? Turns out you need to force the boot priority to the network when there is an [empty] disk attached. To do this, logon to the CVM and run the following:
[code language=”bash”]
$ acli
<acropolis> vm.update_boot_device [VM Name] mac_addr=[MAC Address]
[/code]
Note that the VM Name and MAC address fields are all tab completed, don’t worry if you don’t know the MAC address of the VM.

Now the VM will boot from PXE successfully.
Thanks. Did you manage to set boot order to first pxe and the hd if F12 is not pressed?