Is your database application not performing as well as it should? Is your SQL Server running low on resources? Is your application not written to take advantage of SQL AlwaysOn Availability Groups or database sharding? If you answered yes to any of those questions, then NetScaler Datastream to the rescue! Or, maybe you are looking to demo NetScaler Datastream to get a better idea of what capabilities it has in your SQL environment. If that is the case, look no further – in this post I’ll cover the basics of how to setup NetScaler Datastream to work with a SQL AlwaysOn cluster.
If you are not familiar with what NetScaler Datastream technology is, take a look at this blog post. It allows you to improve SQL Server performance in the same way that the NetScaler improves performance for web servers – SQL connection multiplexing is similar to TCP multiplexing.
How Datastream works with AlwaysOn
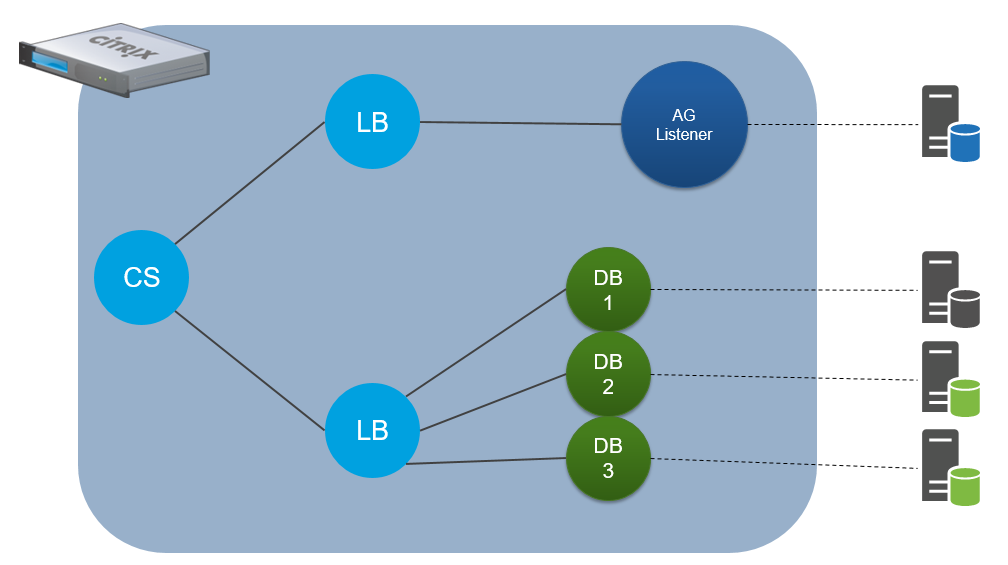
Let me explain. No – there is too much -let me sum up: the NetScaler speaks SQL. A content switching virtual server will be the target for clients connecting to the availability group. This allows the NetScaler to see all of the incoming requests and determine on the fly if they are read requests – meaning the query contains a ‘select’ statement (and not an update, delete, or insert). Once identified, these queries are forwarded to any available replica.
If the query is determined to be a write (it contains an update, delete or insert etc) query, meaning it modifies the database, it is sent to the AlwaysOn listener which is always running on the primary (read\write) replica.
This provides numerous benefits:
- The client connection string does not need to be configured for read-only intent
- All of the benefits of Datastream apply to all connections
- Database scaling is vastly simpler
What you will need
I will be setting up this demo using 3 SQL nodes in an AlwaysOn availability group. I am not going to go over this procedure as it is fairly straight forward and is covered here and here and numerous other places on the internets. In my example, I’m using SQL Server 2012 running on Windows Server 2012R2.
You will be creating a cluster with non-shared storage as well as a listener, so you will need 5 IP addresses: 1 for each node, plus 1 for the cluster and 1 for the listener.
For the database itself, I am using AdventureWorks2012 available to download from here.
The NetScaler configuration includes Content Switching, Load Balancing, Datastream policies, and Integrated Caching – while IC is not required, it makes for vast improvements for any resource intensive read-only queries used more than once. IC is available with Platinum or as an add-on to Enterprise edition.
The Content Switch is the only required IP address on the NetScaler – all of the backing load balancers can be non-addressable.
For further reference, be familiar with the following:
- Prod docs for Datastream: http://docs.citrix.com/en-us/netscaler/11/traffic-management/datastream.html
- Including the 4 use cases in the above section
- This configuration example: http://support.citrix.com/article/CTX201992
Step 1: Get the SQL environment configured
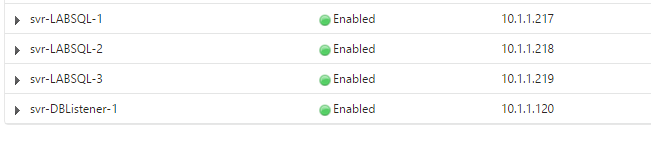
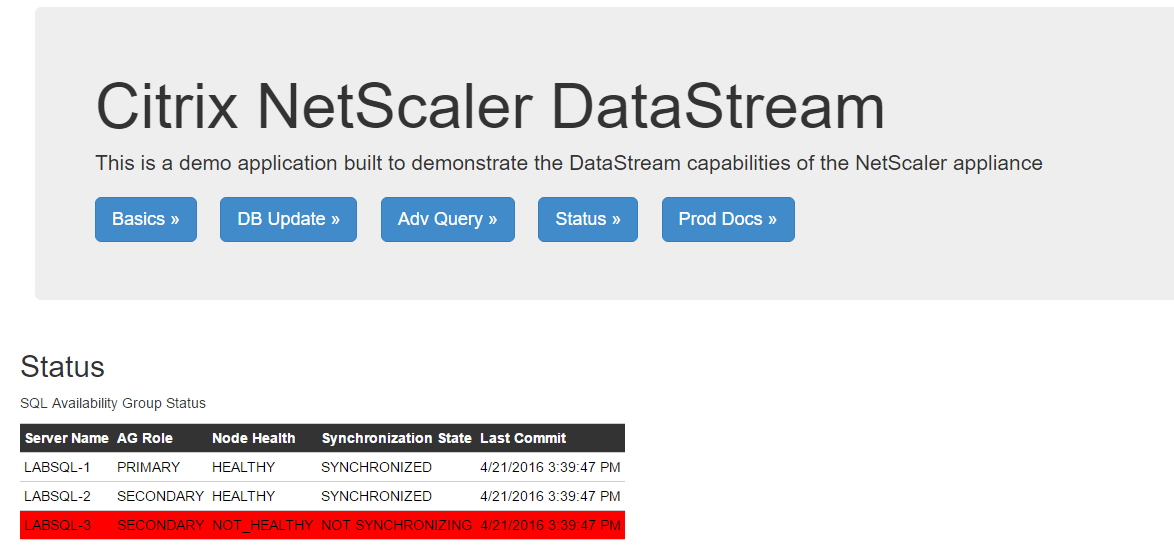
I’m not going to spend much time here, as the links above should provide more than enough guidance on how to setup the nodes and the cluster. In the end, you should have the Availability group dashboard show as follows:
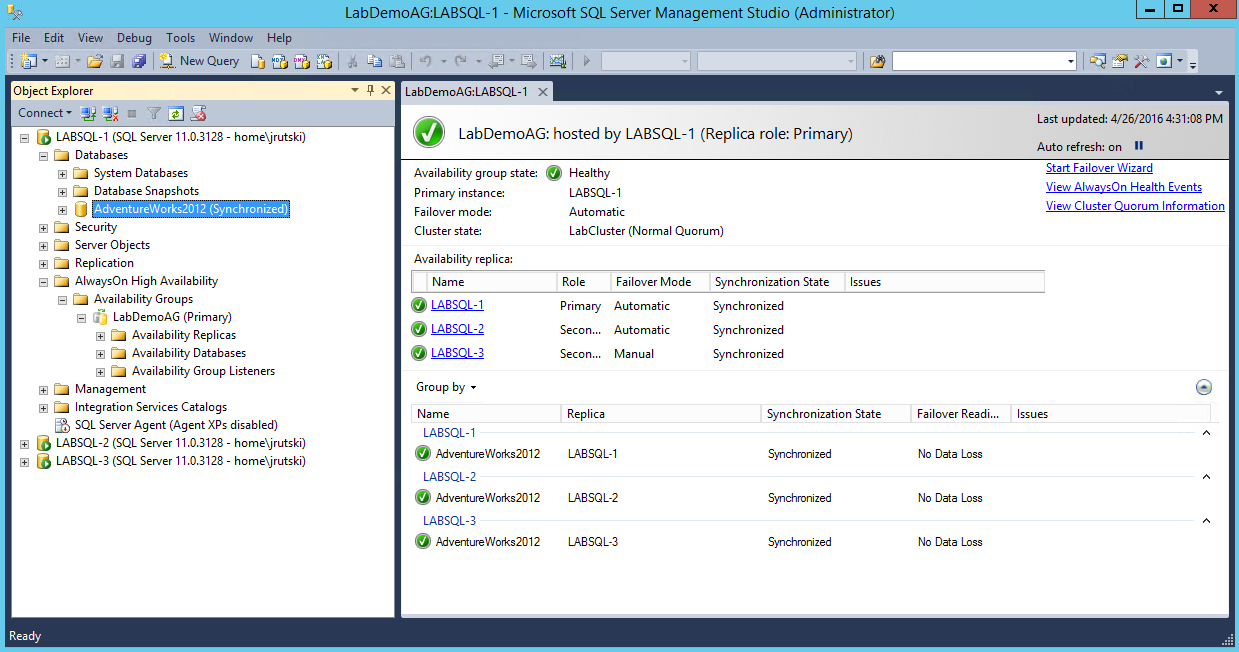
Note that the secondary replicas will need to be set as read\only.
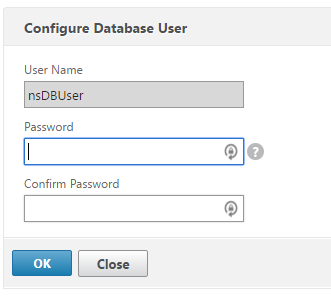
We also need to configure a database user on the NetScaler for it to use for backend connections. This user will need access to the AdventureWorks database as well as server rights as the SQL monitors will use this account as well – in this example, the user is nsDBUser.
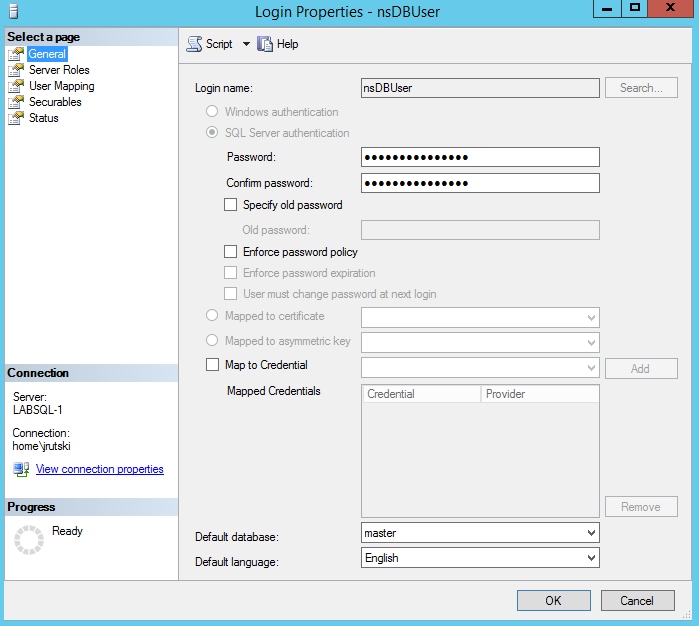
On the NetScaler, configure the user (System > User Administration > Database Users)
Step 2: Configure the servers and services on the NetScaler
We’ll start with defining each of the servers on the NetScaler – do this how ever you are most comfortable, but you will need four in this example: 3 nodes and 1 listener
Then bind the services to these servers – stick with the default TCP monitors for now, we’ll build the custom SQL monitors shortly.
![]()
Next, we need to build the custom SQL monitors – there will be two in this case, one for read queries and one for write queries.
Read DB Monitor
Type: MSSQL-ECV
SELECT name FROM sys.databases a INNER JOIN sys.dm_hadr_availability_replica_states b ON a.replica_id=b.replica_id WHERE b.role=2
Here is what it looks like configured:

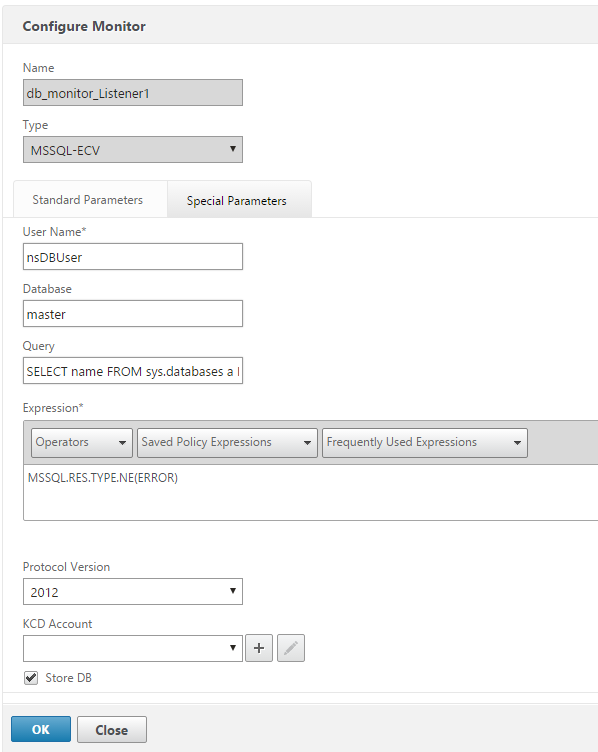
Write DB Monitor
Type: MSSQL-ECV
SELECT name FROM sys.databases a INNER JOIN sys.dm_hadr_availability_replica_states b ON a.replica_id=b.replica_id INNER JOIN sys.availability_group_listeners c ON b.group_id=c.group_id INNER JOIN sys.availability_group_listener_ip_addresses d ON c.listener_id=d.listener_id WHERE b.role=1 and d.ip_address like '10.1.1.120'
**NOTE: change the IP address in the query to match your listener IP address
Configured:
Bind the write monitor to the listener service and the read monitor to the 3 nodes.
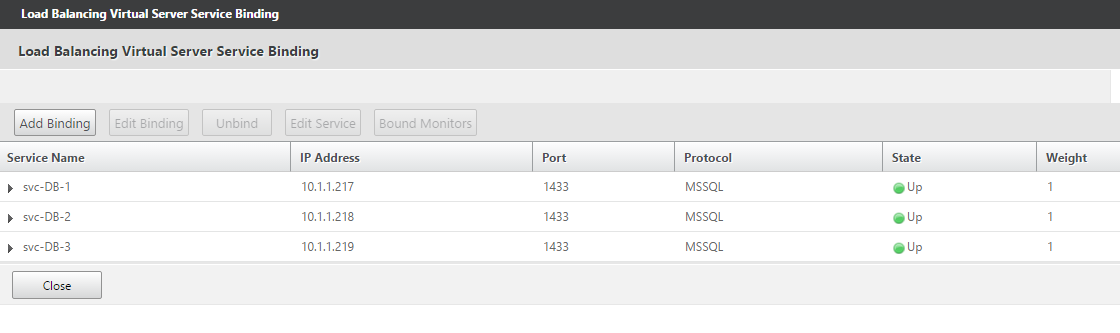
Step 3: Configure the load balancing vServers
For the LB vServers in this demo, we will need 2:
- Read only LB vServer
- Consists of all nodes of the AG cluster (including both the primary and read\only secondaries)
- non-addressable
- load balancing method: Token; Expression: MSSQL.CLIENT.USER

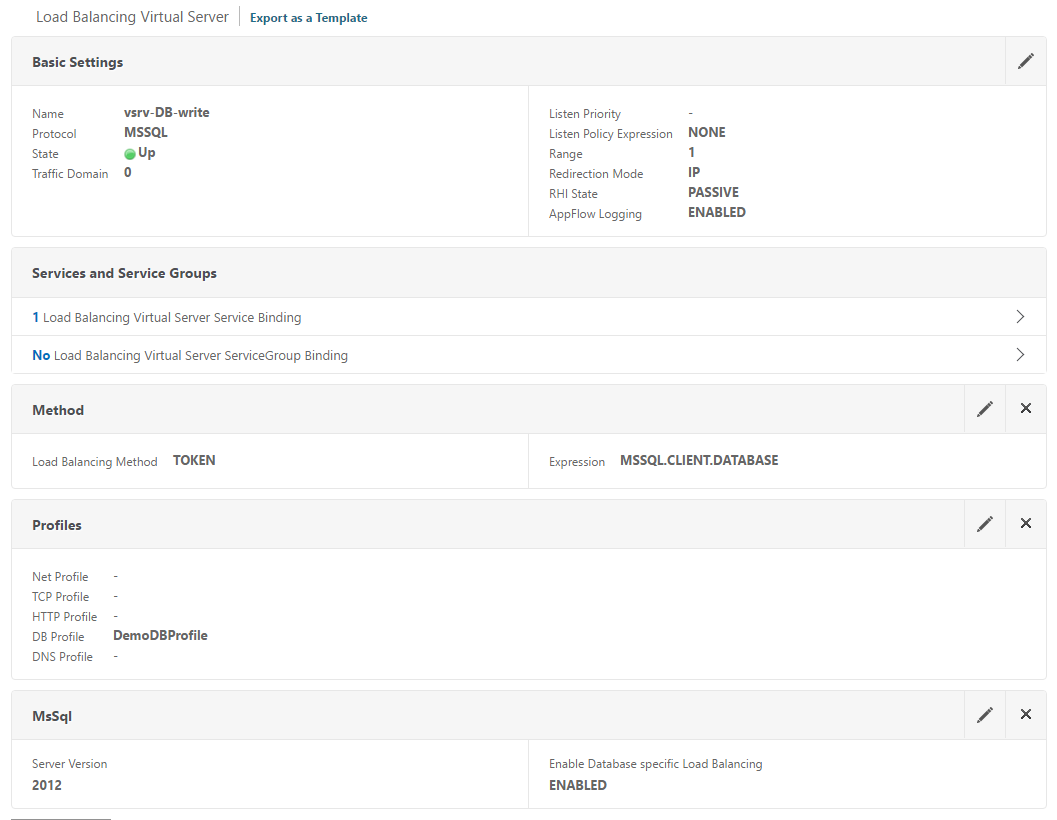
- Writable LB vServer
- Consists of the AG listener service only
- non-addressable
- load balancing method: Token; Expression: MSSQL.CLIENT.DATABASE

Notes:
- The Token load balancing method implies persistence, therefore, do NOT configure a persistence method when using token load balancing
- The expression used should match your scenario
Step 4: Configure the content switching vServer
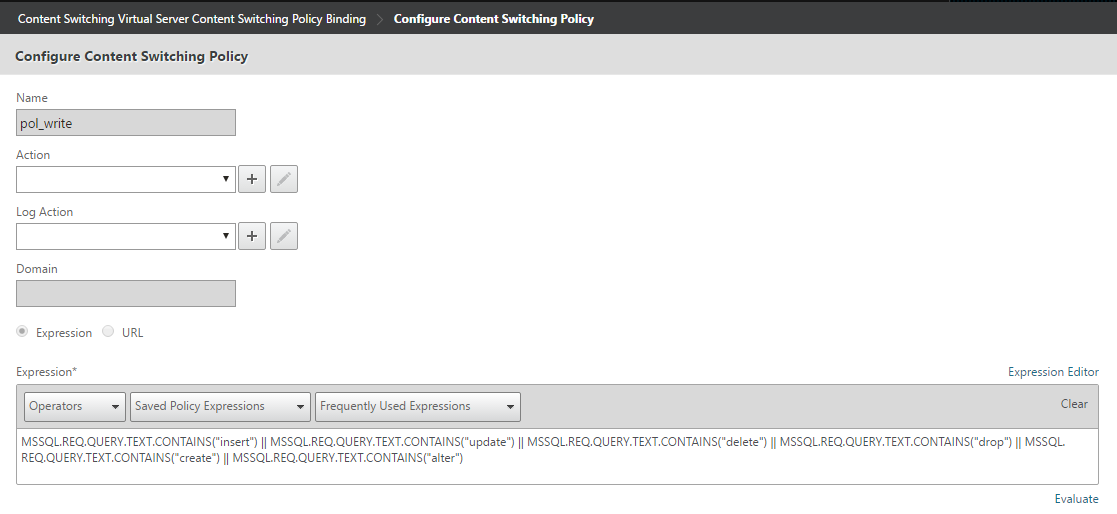
First, we will create the content switching policies – we need two in this case, one for read and one for write.
The write policy contains expressions to match queries that modify the database, so there are several SQL commands at play here:
MSSQL.REQ.QUERY.TEXT.CONTAINS("insert") || MSSQL.REQ.QUERY.TEXT.CONTAINS("update") || MSSQL.REQ.QUERY.TEXT.CONTAINS("delete") || MSSQL.REQ.QUERY.TEXT.CONTAINS("drop") || MSSQL.REQ.QUERY.TEXT.CONTAINS("create") || MSSQL.REQ.QUERY.TEXT.CONTAINS("alter")
Next, the read policy needs to look for a query containing the select keyword.
MSSQL.REQ.QUERY.TEXT.CONTAINS("select")
Now we create the CS vServer – this will be an IP address vServer of type MSSQL on port 1433. The two previously created policies are bound – with target LB vServer set accordingly.


Step 5: Deploy a demo web application
I could not find any demo applications for the AdventureWorks database – I’m sure there are some out there, but I also wanted the ability to make a few changes and configure the app to my liking. That being said, I took some time to create a simple .NET web app that allows you to test and demonstrate the capabilities of the NetScaler Datastream configuration. My goals were:
- A simple, effective web app
- Allowed for a few query types (simple select, insert, and long running queries)
- Needed to be edit-able
So that said, here’s the web app in action – see below for the source code:
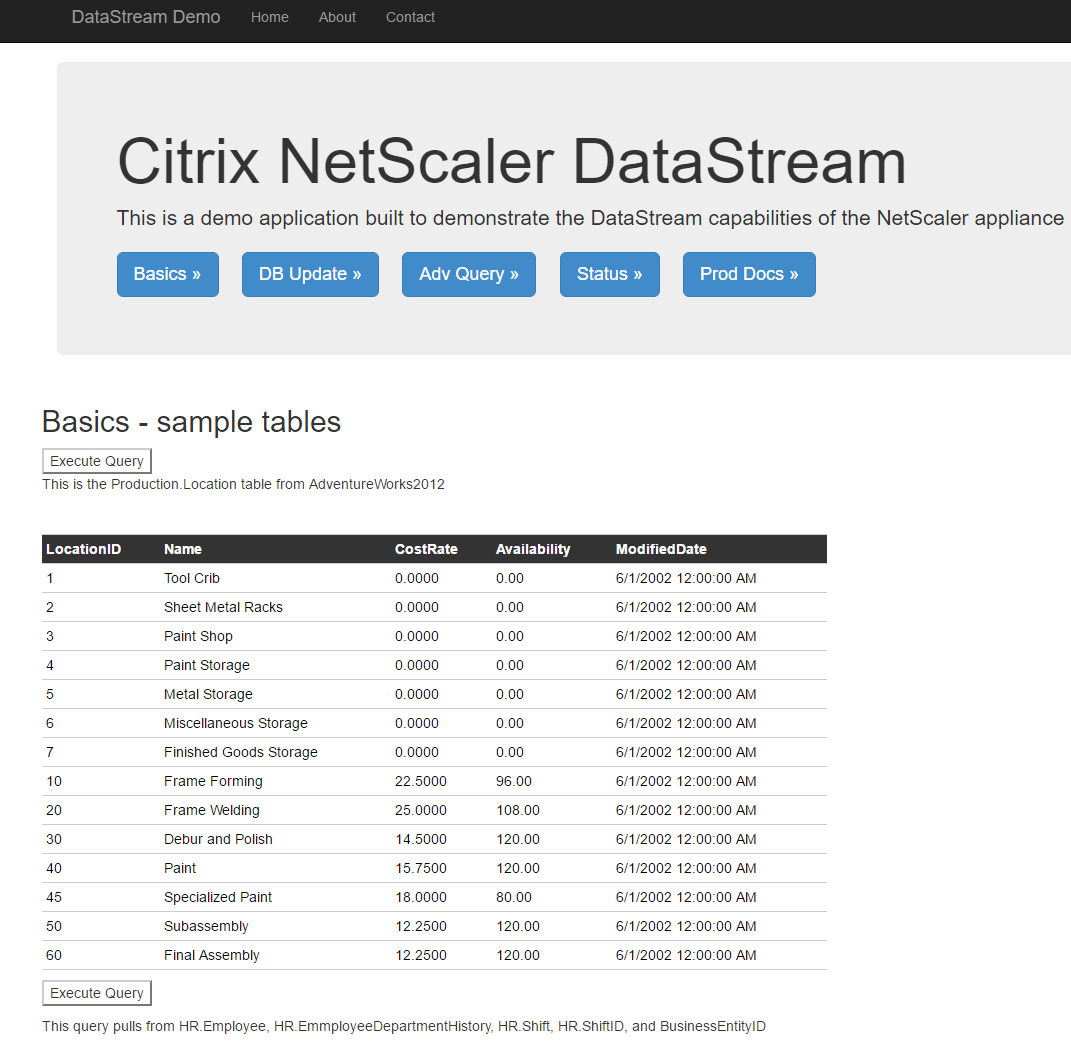
If you are interested in the source code for this, it can be found here: DemoApp1.zip
You will need to modify the two connection strings in the web.config to point to the CS vServer as well as the SQL Listener IP address
BONUS Step 6: Configure integrated caching
As an added bonus, you should also configure the integrated caching feature on the NetScaler to allow for frequently used read queries to have their results cached so that the backend SQL servers do not have to use additional resources on duplicate requests. You’re probably thinking that the data in a database changes from time to time – that’s OK, because the NetScaler is constantly watching the queries being issued such that when a write (insert, update, delete, etc) is made to the database, the contents of the cache are flushed. Don’t forget to enable the Integrated Caching feature if you have not done so already – we will also need to tune the memory available to the SQL DB content group once everything is configured.
First, configure the two cache selectors (Optimization > Integrated Caching > Cache Selectors)
invalidator_db1:
MSSQL.REQ.QUERY.TEXT.AFTER_STR("from").BEFORE_STR(";") ALT MSSQL.REQ.QUERY.TEXT.AFTER_STR("into").BEFORE_STR(" ")
selector_db1
MSSQL.REQ.QUERY.TEXT
![]()
Next, configure content group for MSSQL:

Add the selectors we created previously:
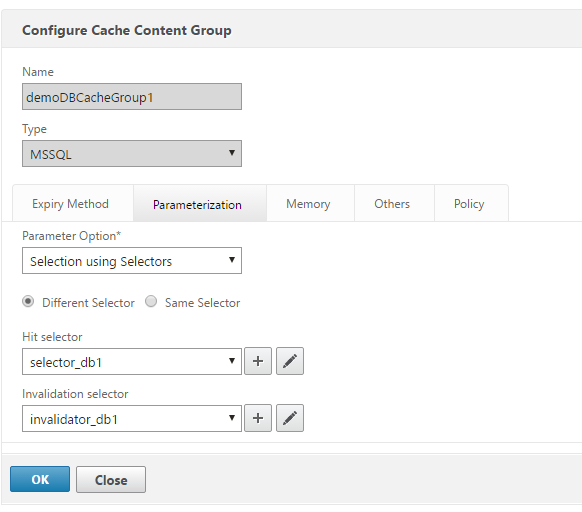
Save the content group for now. We need to create the cache and invalidate policies (Optimization > Integrated Caching > Policies) – we’ll start with the write cache policy that will invalidate the contents when a modification is made to the database. The expression will be:
MSSQL.REQ.QUERY.COMMAND.CONTAINS("INSERT") || MSSQL.REQ.QUERY.COMMAND.CONTAINS("DELETE") || MSSQL.REQ.QUERY.COMMAND.CONTAINS("UPDATE") || MSSQL.REQ.QUERY.COMMAND.CONTAINS("ALTER")

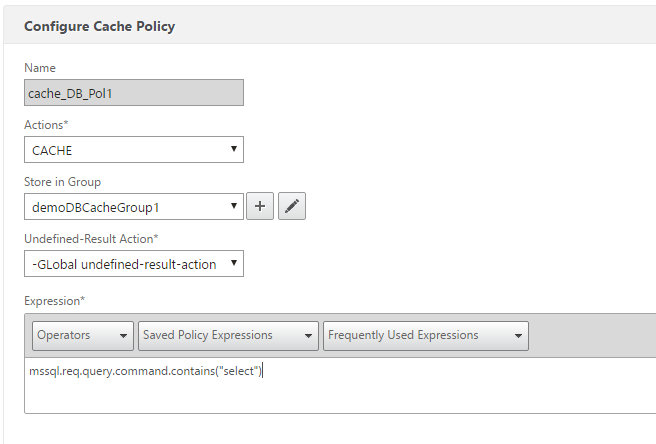
Next the read, or ‘cachable’ policy. Expression:
MSSQL.REQ.QUERY.COMMAND.CONTAINS("select")
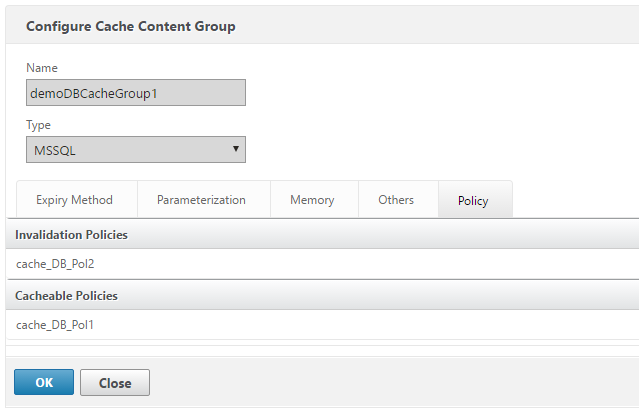
With these policies created, we will add them to the content group.
Finally, bind the cache policies to the previously created content switching vServer – ensuring that the invalidating policy has a lower priority.

Note: if caching was not previously enabled on the NetScaler, you will need to tune the amount of memory available to be used for cache objects – this will require a reboot of the appliance. Please follow this article if you are not familiar with the procedure: http://support.citrix.com/article/CTX124553
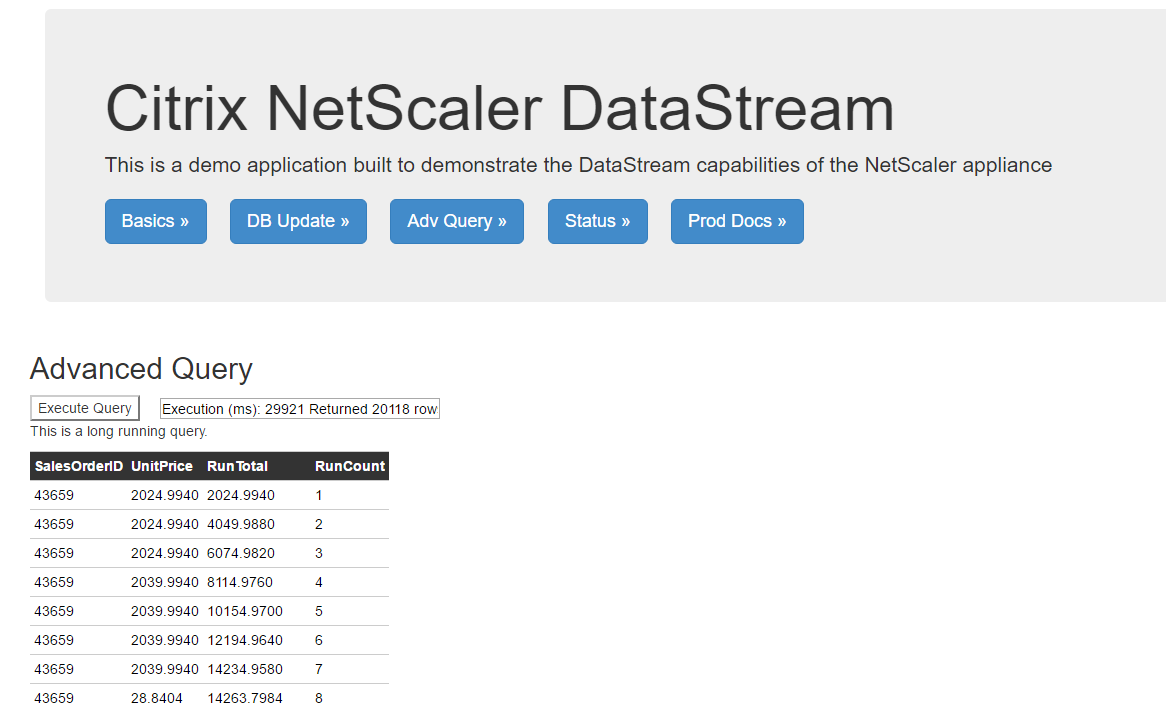
Once you start sending queries to the CS vServer, you should see policy hits as well as cache objects start showing up.
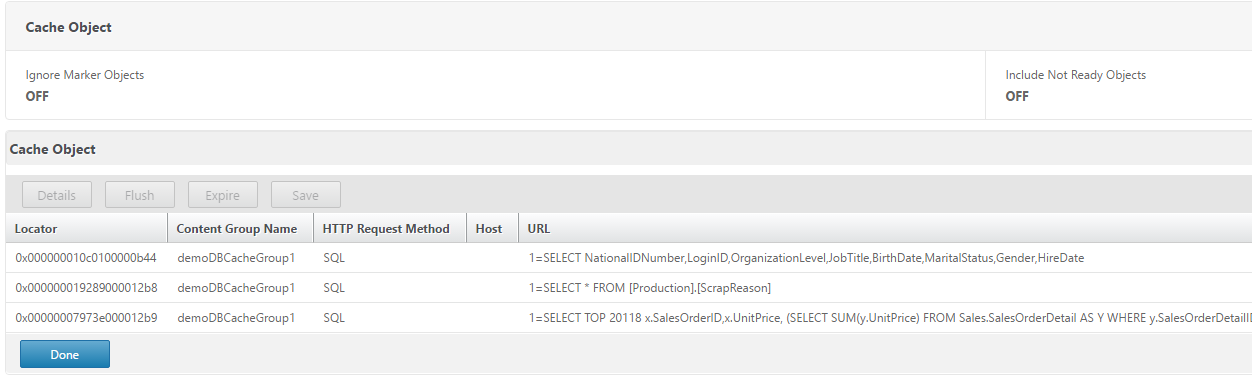
Oh, and that query that previously took 29 seconds, now took 15ms as it was served up from cache.

Summary
NetScaler Datastream can help scale and optimize the performance of your SQL database applications in the same ways that it improves web server performance.
1 thought on “Demo NetScaler Datastream with SQL AlwaysOn”