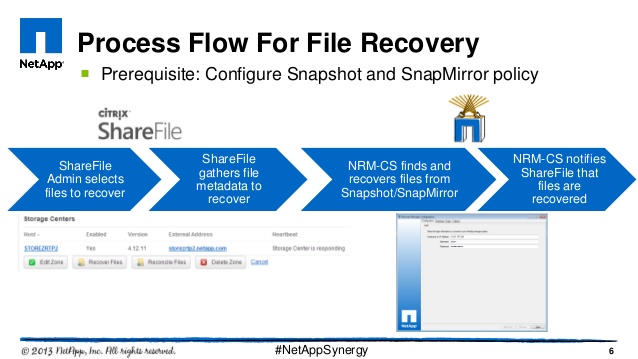
If you have used Citrix ShareFile, you probably already know that it’s a great product – either standalone, or integrated with the XenMobile Enterprise suite. One place where ShareFile can be a bit tricky is file recovery – file restores are a manual process and involve some PowerShell. Fortunately, there are built in APIs that allow 3rd party solutions to integrate and make restoration a bit easier – for example when your local storage zone is stored on a NetApp volume. Having ShareFile on Netapp storage allows you to use a tool known as the NetApp Recovery Manager for Citrix ShareFile (NRM-CS).
First, a little background on the backup and restore process
There are different steps required for file recovery depending on how long ago the user deleted the file.
- Days 0 – 7: The user can manually restore the file from the recycle bin – no administrative action is required (only employees have a recycle bin)
- Days 7 – 14: A site administrator must manually restore the file from the StorageZone admin page
- Days 14+ : A site administrator must request a restore from the StorageZone admin page then manually get the file into the recovery queue then run a PowerShell script…
Lets talk about days 14 and later as the first 14 days allow files to be restored from persistent storage on the StorageZone as they are never actually deleted. Before you can restore files that were deleted more than 2 weeks ago, you need to prepare the StorageZone for backup and restore – following the procedure here. What this does is create a ‘recovery queue’ as well as a location on the server where recovered files get copied to.
When a restore is requested from the admin page, the requested file metadata are added to the recovery queue – running a PowerShell script allows you to determine the details about the file. You can then find the file in your 3rd party backup software, backup tapes, or otherwise, and copy it to the restore location. Once the file is in place, the administrator runs another PowerShell script to ‘pick up’ the file and return it to StorageZone local storage, thus completing the process. More details on this process can be found here.
There is a better way
If your on-premise storage is on a volume on a NetApp filer, all of the scripting and manual processes noted above are automated by the NRM-CS software. The recovery manager runs as a service either local on the StorageZone controller, or on a remote server; watches the recovery queue for file restore requests, then it searches local Snapshots, SnapMirror partners, or SnapVault for the requested file, and restores it.
Full documentation can be found here – here are the prerequisites:
- SnapRestore license on the filer
- User account to connect to the filer
- NDMP credentials on the filer
- The following should already be installed:
- ShareFile storage zone controller
- Microsoft .NET framework
- PowerShell 3.0
Installation and configuration
- Download and install the NRM-CS from the NetApp NOW site
- No configuration needed during install – accept all defaults
- Launch the tool from the start menu
- After installation, only the Recovery service should show as running (green check mark)
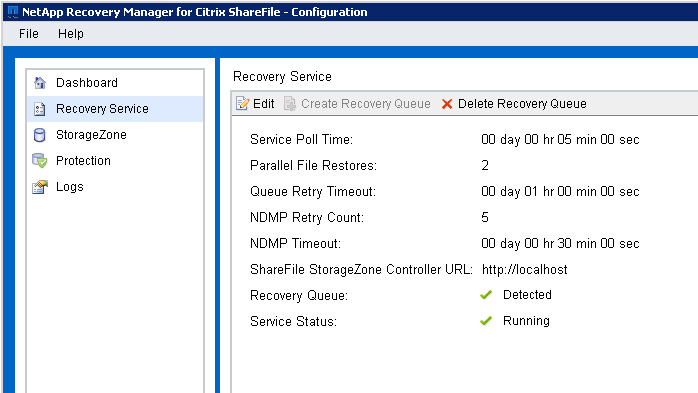
- Edit the Recovery Service
- S elect ‘Recovery Service’ from the left column and choose ‘Edit’
- Modify timers, retries, and StorageZone Controller URL as needed
-
- See the documentation for timing calculations
- Create the recovery queue
- Select ‘Recovery Service’ from the left column
- Select ‘Create Recovery Queue’ from the top bar
- *If a recovery queue had been previously created, delete it using the following PowerShell command: ‘Delete-SCQueue’
- The Recovery Service page should now look like this:
- Connect to the Filer
- Select ‘StorageZone’ from the left column and select ‘Edit’
- Enter the hostname\IP, username and password to logon to the filer
- Select the VServer and volume hosting the data
- Enter NDMP credentials
- If the user account is non-root, unique NDMP credentials must be created – see https://library.netapp.com/ecmdocs/ECMP1196992/html/GUID-3C7110E3-722D-4E1B-8CEC-122AEEEB089B.html
- To generate a password, run the following on the filer: Ndmpd password <useraccount>
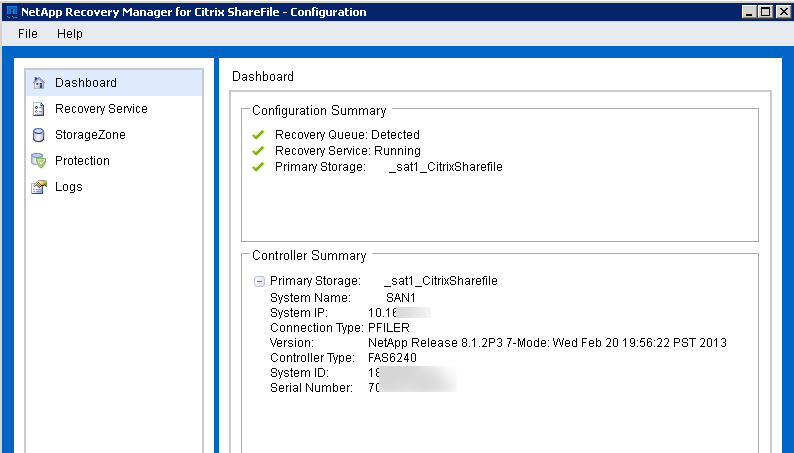
- At this point, NRM-CS will be able to service recovery requests from local snapshots – the dashboard should appear like this:
That’s it!
The ShareFile restore process for items outside of 14 days has now been simplified and automated. You can add additional protection locations such as SnapMirror partners or SnapVault – see the documentation for further detail.