As of yesterday, MDT 2013 Update 1 is available for download – this is the much awaited update to MDT that allows for deployments using Windows 10. It requires two updates:
- The Windows ADK for Windows 10 – https://msdn.microsoft.com/en-us/windows/hardware/dn913721.aspx
- MDT 2013 Update 1 – http://www.microsoft.com/en-us/download/details.aspx?id=48595
The ADK is the largest install – if you have installed the ADK before, you know that the initial file you download is just a setup tool – the actual download happens once you select which components you would like to install. The Windows 10 ADK is no different.

Select the following options:
- Deployment tools
- WinPE
- ICD
- USMT
Once installed, move on to the MDT 2013 Update 1 installer – there is not much to the MDT installer.
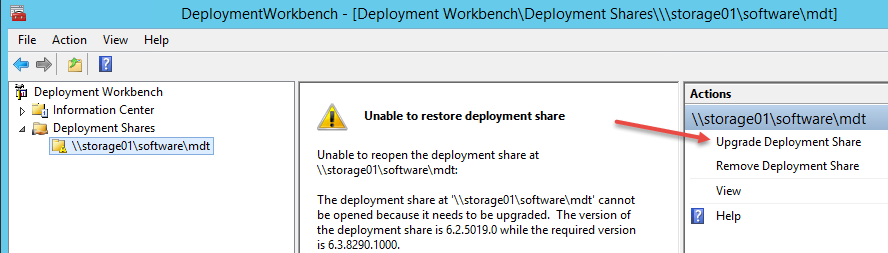
If this is an upgrade of a previous MDT deployment (as mine is) you will not be able to open your existing deployment share until it is upgraded.
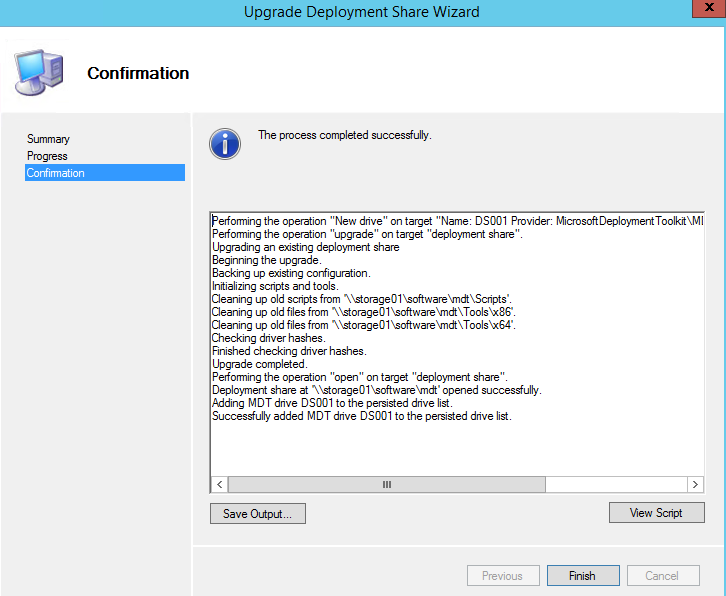
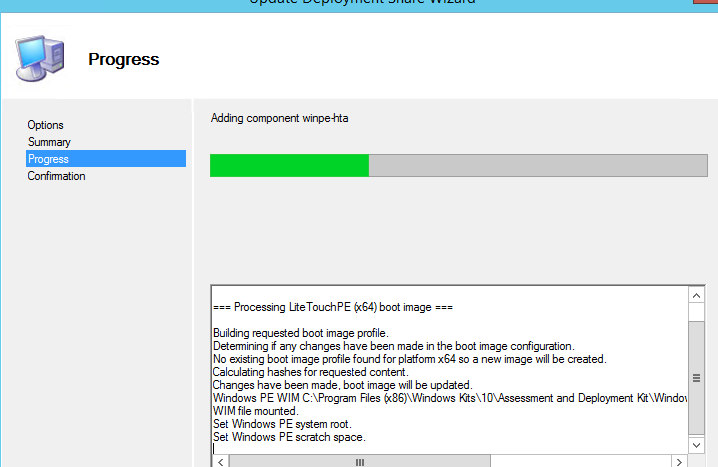
Once upgraded, you will now have access to the share again. Next, update the share to include all of the new Windows 10 specific tools and the Windows 10 WinPE – you will need to rebuild the boot images from scratch. That being said, you should also add any drivers that are specific to Windows 10 to be injected into the WinPE image.
Now you can add your Windows 10 images and start deploying them!
Note 1: If you’re using Windows Deployment Services to PXE boot into the MDT WinPE, don’t forget to update your Boot image to the latest boot image from MDT – it needs to be a version 10 image in order to deploy Windows 10 machines.

Note 2: Starting with Windows 8.1, some updates were deployed as ESD files, or Electronic Software Distribution files. Several of the Windows 10 downloads are in this format, which means that your install.wim files will be compressed and not compatible with MDT.
To modify them, use the following procedure (sourced from here):
- Create an empty folder
- dism.exe /Capture-Image /ImageFile:C:\Temp\Install.wim /CaptureDir:C:\EmptyFolder /Name:EmptyWimImage /Compress:max
- dism.exe /Export-Image /SourceImageFile:C:\ESDImage\Install.esd /SourceIndex:1 /DestinationImageFile:C:\Temp\Install.wim /Compress:Recovery
- dism.exe /Delete-Image /ImageFile:C:\Temp\Install.wim /index:1
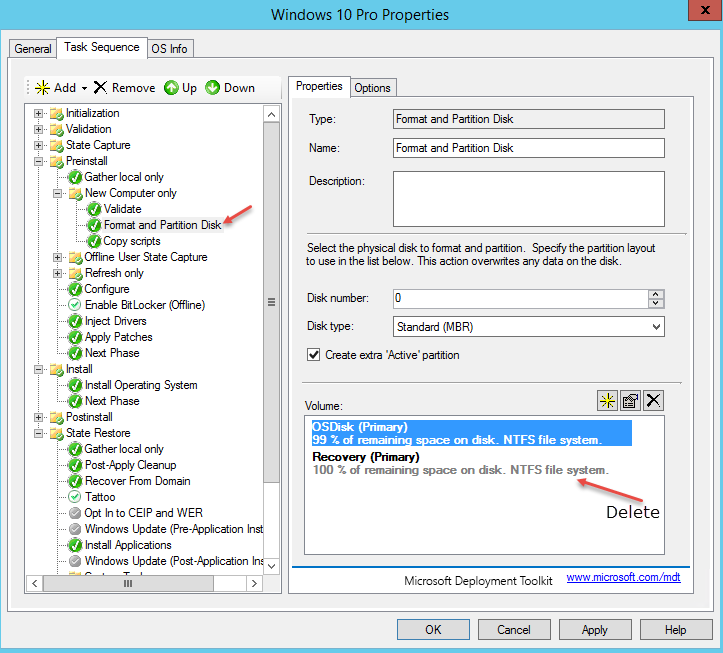
Once this is done, the install.wim can be replaced back into the full install location, however you will need to make a modification to the task sequence to ensure that you don’t create a recovery partition taking up 99% of the disk.
Edit: The following method also works:
- Determine the image index you want to use: dism.exe /Get-WimInfo /WimFile:install.esd
- Export the image: dism.exe /Export-Image /SourceImageFile:install.esd /SourceIndex:6 /DestinationImageFile:C:\Temp\Win10Install.wim /Compress:max /CheckIntegrity